
How to use Chromakey to replace video background
As any modern video editor, Bolide Movie Creator has a function to replace a solid background.
What is Chromakey
Chromakey is an algorithm that allows you to combine multiple videos or images in one frame. With the help of a chromakey, you can "remove" the background and "add" an image or video through the video editor.
How to properly shoot a video for Chromakey
The result of applying the Chromakey algorithm depends on how you shoot the video. The primary condition is a uniformly lit solid background. It is unnecessary to use green. You can use blue (but not white or black! Red is also a wrong choice). Before shooting, make sure that there are no colors on the object of interest that match the background color. Otherwise, these areas will also be cut out by the algorithm. Look at the picture:
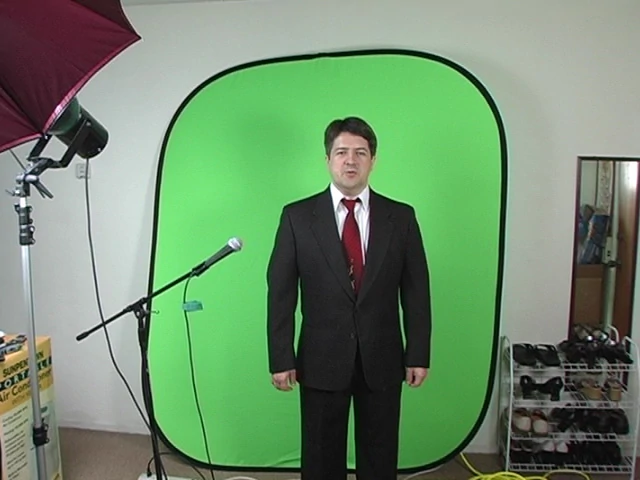
You see, the man is well-prepared for the shooting - he not only bought a proper background on Aliexpress but also took care of special lighting (by the way, it is easy to buy on Aliexpress). What if he had a green tie? He would have had to re-shoot with another one!
How to use Chromakey in Bolide Movie Creator
Now, the details about how to use Chromakey in our favorite video editor.
- Add the correctly shot video to the Photo/Video Library tab, and then drag it with the mouse to one of the project tracks.
- You need to transfer the desired background (video or picture) to the track UNDER the chromakey video and arrange it in parallel. If you don't have a free track below, click the green plus sign "Add track at the bottom" under the track headers, and it will be added.
-
Select your chromakey video (left-click on its block in the project), click the "Operations on visual blocks" button, and select "Chroma Key" effect from the drop-down menu. Here's a screenshot, so you don't get lost :) The effect works for photos too, for example a picture of a person on a green background.
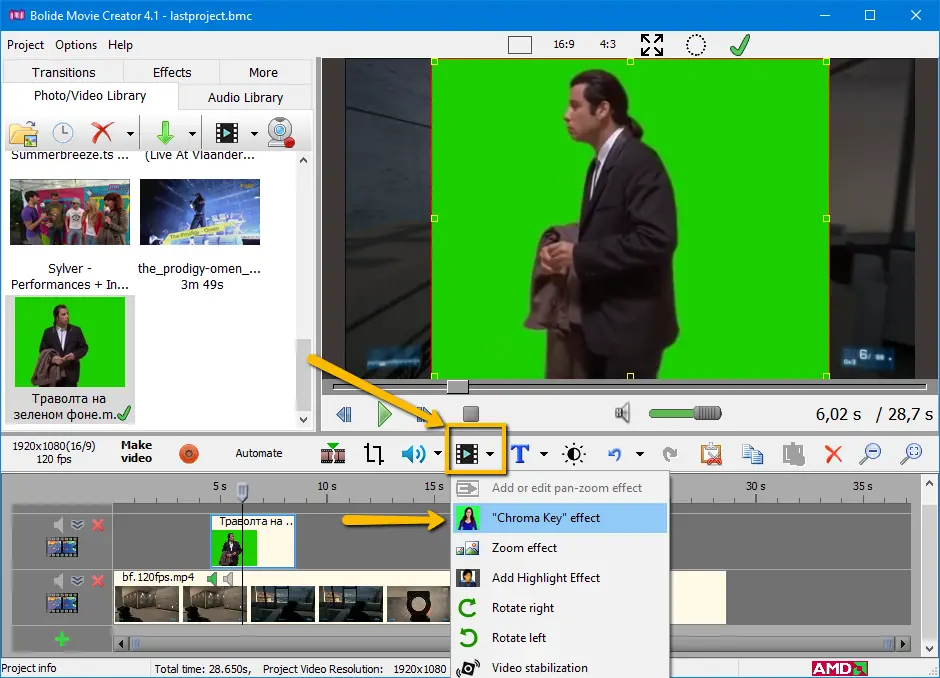
- The editor will try to determine the background color to replace it automatically. But you can always help him! The "Chroma key settings" dialog has an eyedropper tool that lets you choose the "Transparent color". To do this, left-click on the eyedropper next to "Choose color..." and, without releasing the left button, drag it to the desired color in the preview area.
-
Now it will be necessary to adjust the "Sensitivity" slider (0 to 100, the value is shown in the field under it) in such a way that the excess is not cut off, and the background artifacts do not appear. If your video is shot with good lighting, this will work without problems.
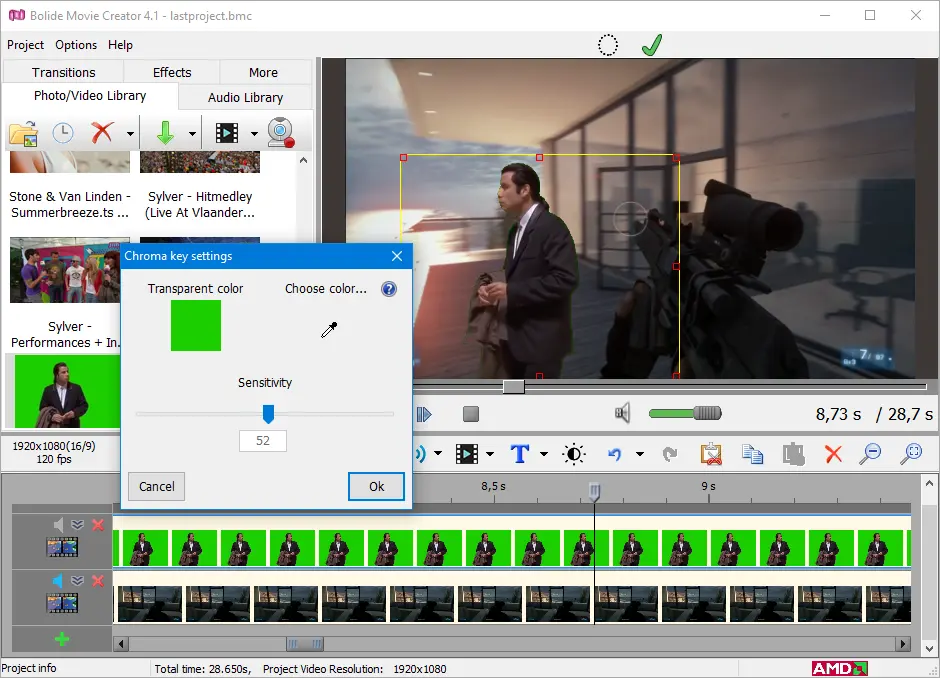
- When the dialog is open, a frame appears in the preview window: this is the area of the effect. Chromakey is applied only inside this area, and everything outside it becomes transparent. Move and resize the frame to cut off the edges of the green screen, a light stand or other clutter. The "Switch between an ellipse and a rectangular selection area" button on the panel above the preview turns the area into an ellipse and back; "Done" hides the frame. This is also a good way to get rid of artifacts at the edges of the frame; another option is to crop the video.
- Click "Ok" (or press Enter) to keep the settings. "Cancel" (Esc) returns the previous color and sensitivity.
- If you need to remove the effect or return to its settings again, click on the small effect icon in the upper right corner of the video block in the project. The pop-up menu has the "Settings" and "Delete this effect" items. For a photo, you can also open the settings by double-clicking the picture in the preview window. Other effects for a clip, such as color filters and blur, are on the Effects tab, see Video Effects.
That's all. I hope you succeed!
Back to Video Editing Guide.