
Convert Video to another Format
Just because you have a video clip doesn't mean it's automatically ready to use (in the format you need). Sometimes it's necessary to convert from one format to another. This is helpful when you want a uniform look throughout the movie. For example, when you make a video using clips that are saved in lots of different formats and qualities, it will be noticeable in the final version. A simple and quick way around that is to pick a format and convert all the clips in the project to that format.
How to convert a video in Bolide Movie Creator
To convert a clip, you simply add it to a project and save the project as a video file in the format you need. Step by step:
- With your video on the timeline, click the Save as Video button on the timeline toolbar. You can also use the menu Project > Save as video file... or press Ctrl+Enter.
-
The Save to Video dialog opens. Here you choose where to save the file, its name, the format and the quality before you render it.
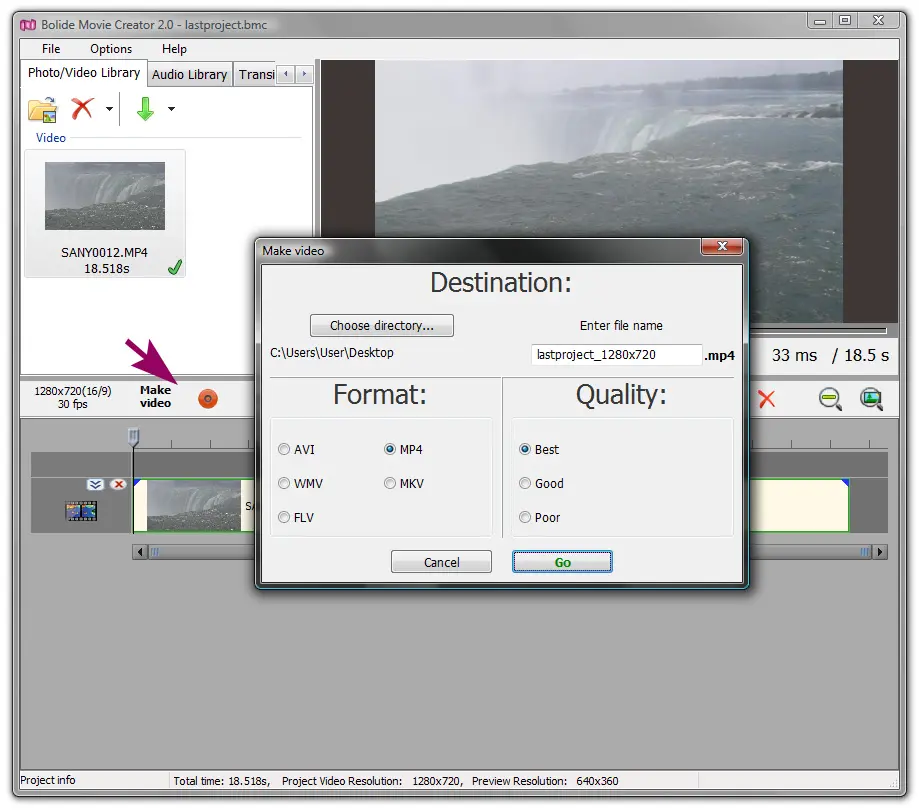
- Save to: the upper field is the folder (the button next to it opens a folder picker), the lower field is the file name. The extension of the chosen format (for example, .mp4) is shown right after the name and changes automatically when you pick another format. By default the file is named after the project with the video size added, for example my_project_1920x1080.
-
Choose the Format from the list:
- MP4 (Best compatibility) — H.264 video, AAC sound. Plays almost everywhere: phones, TVs, YouTube and social networks. If in doubt, choose this one.
- MP4 (H.265) (Smaller files) — the same MP4, but with the HEVC codec: the file is usually noticeably smaller at comparable quality. Some older devices and players cannot play it.
- MKV (All features) — H.264 video and AAC sound in the Matroska container, with the widest choice of codecs in Customize.
- AVI (Legacy compatibility) — MPEG-4 video and MP3 sound, for old players and devices.
- WMV (Windows Media) — WMV video and WMA sound.
- GIF (Classic animation) — an animated picture without sound. Suitable only for short clips at a modest resolution.
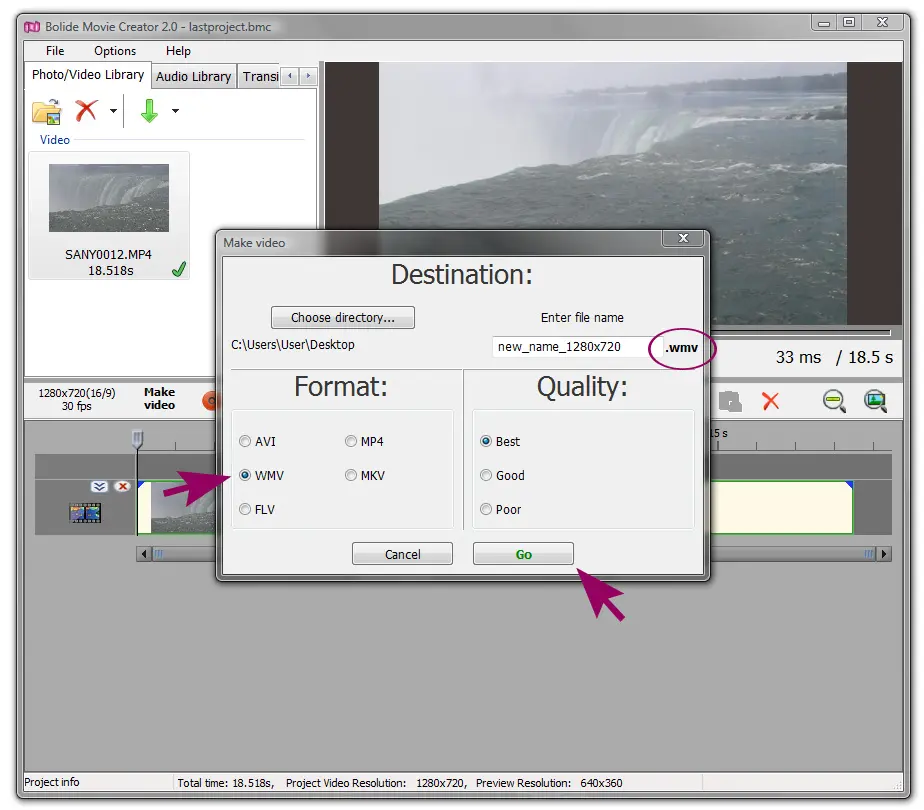
- Choose the Quality: Low, Standard or High. Below the tiles is a slider from Small file to Large file that shows the video bitrate; you can move it to set your own value (this relates to video compression levels). The higher the bitrate, the better the picture and the larger the file. The Estimated file size line shows roughly how big the file will be for the length of your project. The bitrate for each tile is calculated from the project resolution, frame rate and codec, so "Standard" is a good choice in most cases.
- For GIF there is no quality slider. Instead you set the Frame rate: (5, 10, 15, 25 or 30 fps) or tick Same as source. The size of a GIF depends on how complex the picture is, so it cannot be estimated in advance.
- GPU acceleration. If your graphics card (NVIDIA, AMD or Intel) can encode the selected codec in hardware, this checkbox appears for MP4, MP4 (H.265) and MKV and is ticked by default. Hardware encoding is much faster; untick it if you prefer software encoding. For AVI, WMV and GIF, and on computers without a suitable encoder, the checkbox is not shown. If your NVIDIA driver is too old for hardware encoding, the dialog tells you so and shows which driver version is required.
-
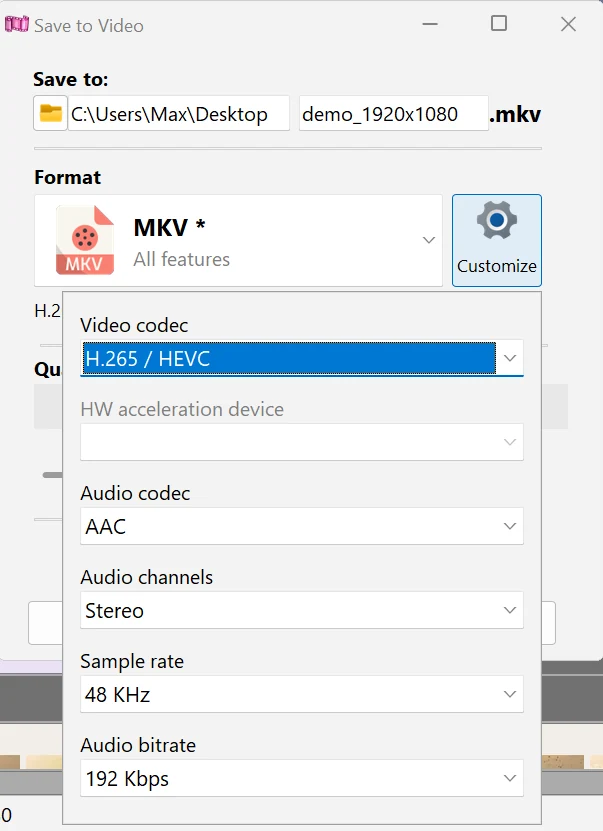
The Customize button (not available for GIF) opens a small panel with advanced settings:
- Video codec — for MP4 and MKV: H.264 or H.265 / HEVC. This is the way to get an MKV file with HEVC.
- HW acceleration device — if the computer has several graphics adapters that can encode the chosen codec, pick the one to use: NVIDIA, AMD or Intel.
- Audio codec — MP4: AAC or AC3; MKV: AAC, AC3, MP3, Opus or Vorbis; AVI always uses MP3 and WMV uses WMA.
- Audio channels (Mono, Stereo, and for AAC/AC3 also 5.1; AAC also 7.1), Sample rate and Audio bitrate.
- The resolution (frame size) and frame rate are not set in this dialog: the video is saved with the project settings. To change them, close the dialog and use the Output video resolution button on the timeline toolbar (see Project Video Resolution and Frame Rate). If the project settings are lower than the quality of your source files, a hint appears over the dialog suggesting better settings with a button to apply them. If the project begins with an empty space of a second or more, the hint offers to Remove it. The maximum size for saving is 4096 pixels per side; for a larger project the program offers to reduce the resolution proportionally.
- All that's left is to click the Go button. If a file with the same name already exists, the program asks what to do: Yes replaces the old file, No cancels saving, and Rename: saves the video under a new name (a free name with a number is suggested).
-
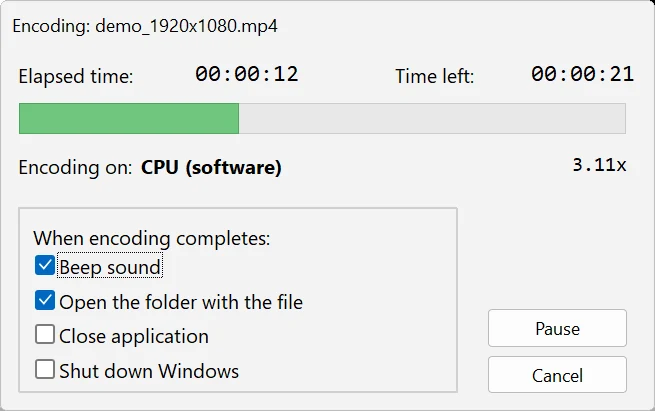
While the video is being saved, a progress window shows the elapsed time, the time left and which device is doing the encoding (Encoding on:). You can Pause the process, and under When encoding completes: choose what to do at the end: Shut down Windows, Close application, Open the folder with the file, or Beep sound. Other program options are described in Program Settings and the Help Menu. When saving is complete, your new video is in the format you chose.
- Need only the soundtrack? Use Project > Save audio to file: the sound of the whole project is saved as an MP3 file. The same item in the right-click menu of a block on the timeline saves the sound of that clip only. A single frame of the project can be saved as a PNG or JPG picture, see Saving a Frame as a Picture and Viewing File Info.
- To learn more about the different formats check out our Video Editing Glossary.
Back to Video Editing Guide.