Editing a video in Bolide Movie Creator. Tips and tricks
Our users frequently ask us to provide some tips about using the Bolide Movie Creator. In this article, you can find all kinds of things about using Bolide Movie Creator that are inconspicuous or... let’s be frank, not very intuitive. Hopefully, these tips and tricks will make your experience with Bolide Movie Creator more enjoyable.
Our tips and tricks are divided into four sections. Use the list below to move quickly to a section you are interested in. We recommend that you read all of them. Hopefully, they’ll help you become a true video editor! Here’s the list:
Accurate positioning
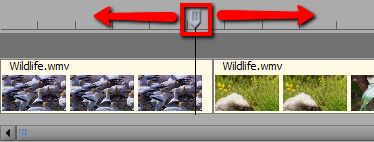
Oftentimes, when you want to remove an unnecessary piece of video, you need to position the cursor on the timeline very accurately. Bolide Movie Creator allows you to position the cursor accurate to one frame! You can do it by pressing the left arrow or right arrow keys.
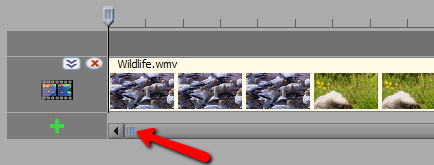
Important note: You can scale the project timeline in a wide range. It may be useful when you are editing long video clips in which you need to select an exact point. If you "stretch" such a clip, you will see many more video frames in the block, which will make it easier to find the necessary point. To scale the project timeline, click and drag the three short vertical blue stripes on the slider under the project to the left or the right, or rotate the mouse wheel while holding down the SHIFT key.
<
Handling blocks on the timeline
Here are some tips and tricks:
- You can select several blocks by clicking them one by one while holding down the CTRL key.
- You can move several blocks at once after selecting them as described above. You can also delete, cut, or copy them at once.
- If you bring a block close enough to another one, they will automatically stick together. When this behavior is unwanted, hold down the SHIFT key while moving a block, and no sticking will occur.
- If you have Bolide Movie Creator v3.3 or higher, you can easily split a project that consists of several tracks by right-clicking the cursor and dragging it to the right. Each block in each track located to the right of the cursor will move to the right.
- If you need to use the same piece of video, photo, or text in your project several times, you don’t have to select and drag it each time from the library. Instead, you can copy it once by clicking the Copy button (or pressing CTRL-C), and then insert it into the project as many times as necessary by clicking the Paste button (or pressing CTRL-V).
Handling tracks
Bolide Movie Creator allows you to use as many tracks (layers) as you want. If you add blocks to the top track, it will automatically add an empty track. If you need to add a track below another track, click the green plus sign that you can see in the bottom-left corner of that track. Please keep in mind that the tracks are always layered from bottom to top. Our users frequently ask us how to fill the black bars with something if the video image does not occupy the entire frame. Actually, all you need to do is place a block containing a background of your choice (a video or a static image) in the track below that video track. Alternatively, you can right-click the video or static image block and select "Blurred background" in the pop-up menu.
If you have a lot of tracks in your project, you can change their height so that you can see more or fewer tracks at the same time. To change the height of a track, click the special button located to the left of that track:
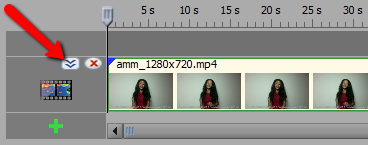
You can also completely remove an unnecessary track by clicking the red cross button located near the special button.
General tips
- If you made a mistake when editing a video but recognized it in good time, don't try to fix it manually (especially if multiple blocks are affected). It is much easier to click the Undo button (or press CTRL-Z). So feel free to experiment!

- As you probably know, transition effects are applied at block intersections. But what if you need to add a transition effect at the beginning or the end of your project, where there are no intersections? No problem! Look at the small blue triangles at the beginning and at the end of each block. You can click and drag such a triangle to increase or decrease the effect duration:
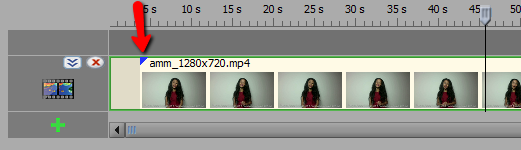 By default, Bolide Movie Creator applies the fade-in and fade-out effects to your video. But you can right-click the effect area in a block and select any other effect in the pop-up menu.
- Do you want to learn to use a video editor like a pro? If your answer is yes, read about the keyboard shortcuts in Bolide Movie Creator, memorize them, and use them. Keyboard shortcuts allow you to edit a video much quicker.
Back to the Video editing guide.