
Change Video Transparency
Transparencies are helpful when you want to have more than one visual element appear on the screen at the same time. Also known as superimposing, creating transparencies can add a classy effect to your movie making projects. In fact, many effects like fade out/in are technically a form of transparency because they involve taking one or more clips and setting the opacity to less than 100%. You can also apply transparency to a single image or clip to reduce its opacity.
Overlay video with transparency in Bolide Movie Creator
-
To make a video or photo clip see-through, right-click it on the timeline and choose Transparency. By default Full Opaque is selected: the clip is 100% solid and shows as usual.
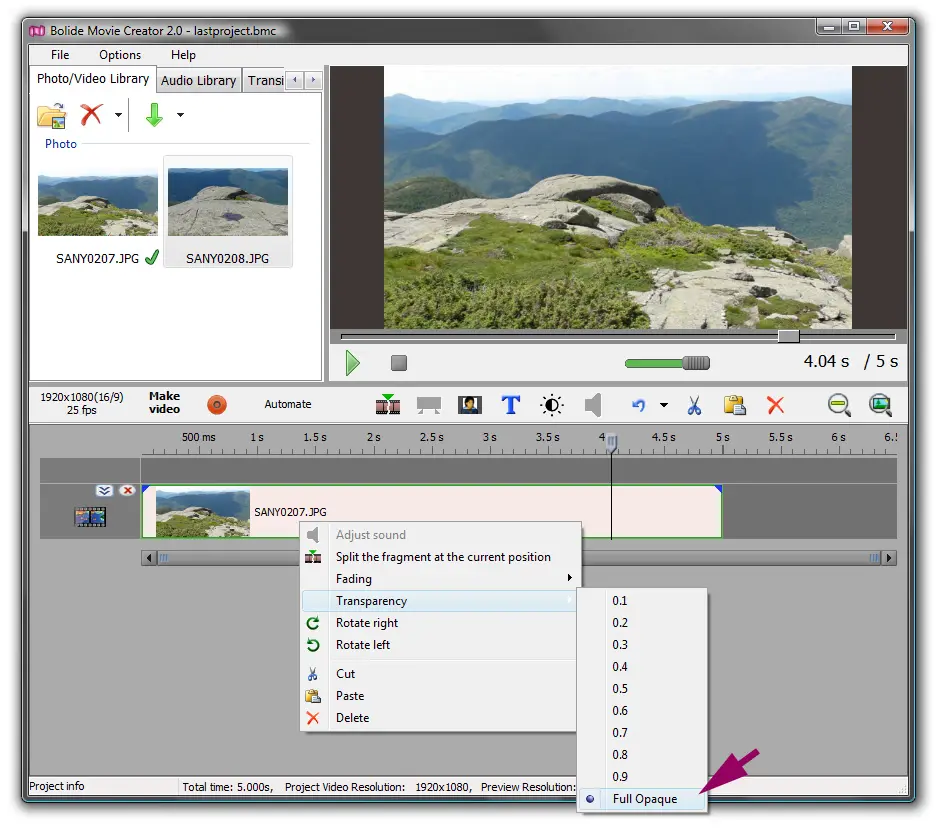
-
The numbers set how solid the clip stays: the lower the number, the more see-through it is. For example, 0.5 makes the clip 50% opaque, so the image below shows through it by half.
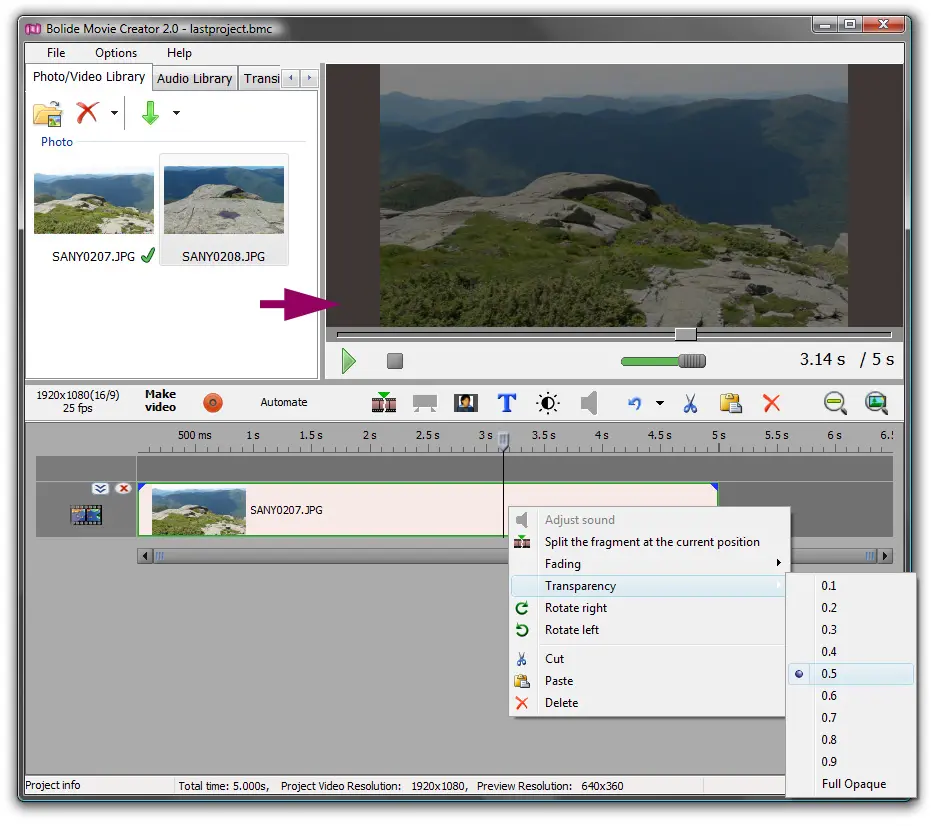
- If several video or photo clips are selected, the chosen value is applied to all of them at once.
-
To see two visual elements at the same time, place them on different tracks one above the other and lower the opacity of at least one of them. Note: the upper track has visual priority. Without transparency, the image on the upper track completely covers the image below it.
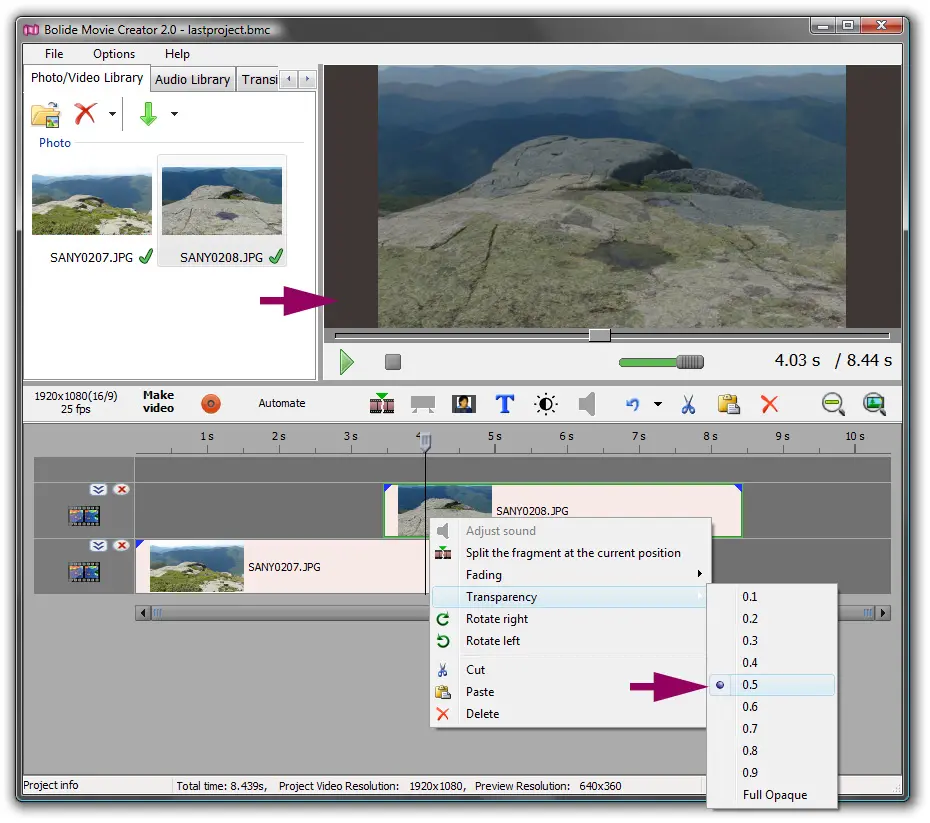
- For example, overlap two tracks and set 0.5 for the image on top. In the preview window you will see both images: the lower one shows through the upper one.
- Remember that you can change the size and position of any image or video right in the preview window with the mouse. For example, you can place one video in the lower right corner of another. To stretch the clip back to the whole frame, double-click it in the preview window.
- Text blocks do not have the Transparency item. The transparency of text, its outline and background is set in the text settings window, see Text Settings Explained.
Back to Video Editing Guide.