
Add Transitions and Effects
As you begin to create more advanced movies by adding multiple clips together, you'll want to consider adding transitions to help smooth over the edges where your clips meet. On the Transitions tab, you'll find 100 transitions grouped into four categories. Video effects for a single clip are on the Effects tab (see Video Effects), and the Virtual Screen templates, including the option to create a new template from an image, are on the More tab.
- To apply a transition (moving from one video or photo to another with a special effect), place at least two clips on the same track on the timeline. You can add clips with the green Add selected video/photo to project arrow, or by dragging and dropping them from the Photo/Video tab. Transitions also work between background blocks, see Backgrounds: Color, Gradient and SVG Elements.
-
Position the clips so that the end of the first slightly overlaps the beginning of the second on the same track. The overlap area between them is hatched — that is where the transition will be applied.
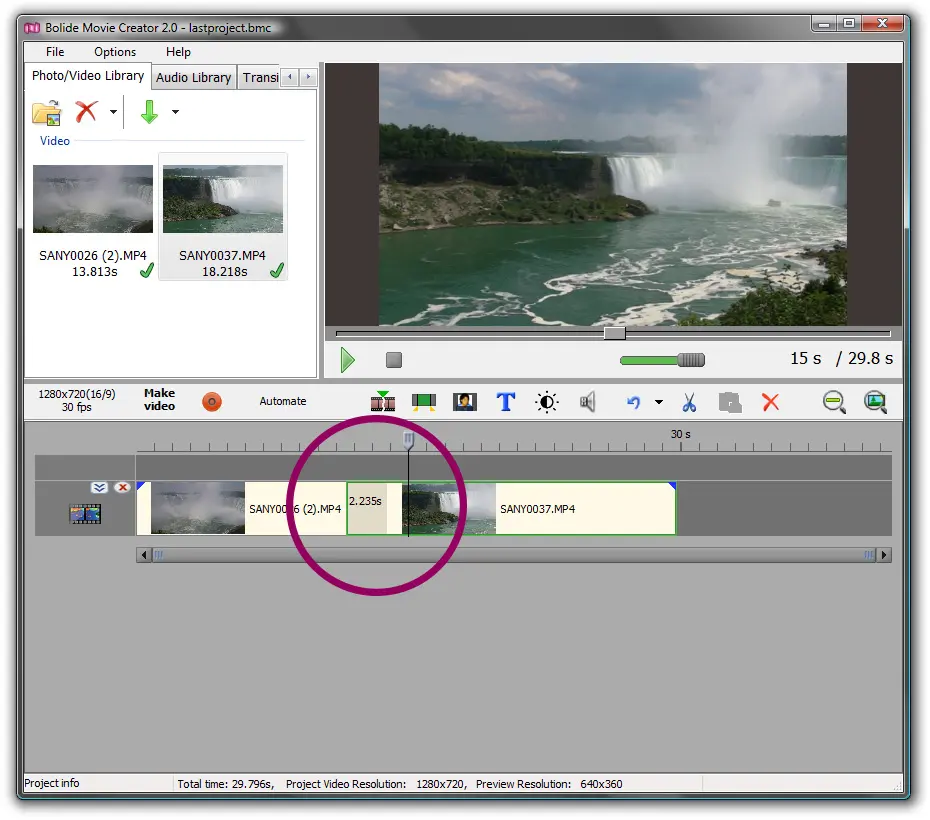
- On the Transitions tab, transitions are grouped into four categories: Basic, Wipes & push, Geometric and 3D & motion; large families of similar transitions are collected in subgroups. Hovering over a transition shows an animated tooltip, and a click on it plays a demonstration in the preview window.
-
Drag the chosen transition onto the intersection of the clips. You do not have to overlap the clips manually first: if you drop a transition where two visual blocks are merely touching, the program will overlap them by the default transition duration and add the effect. The default duration is 1.0 second; you can change it in Options > Quick Preferences > Default transition duration...
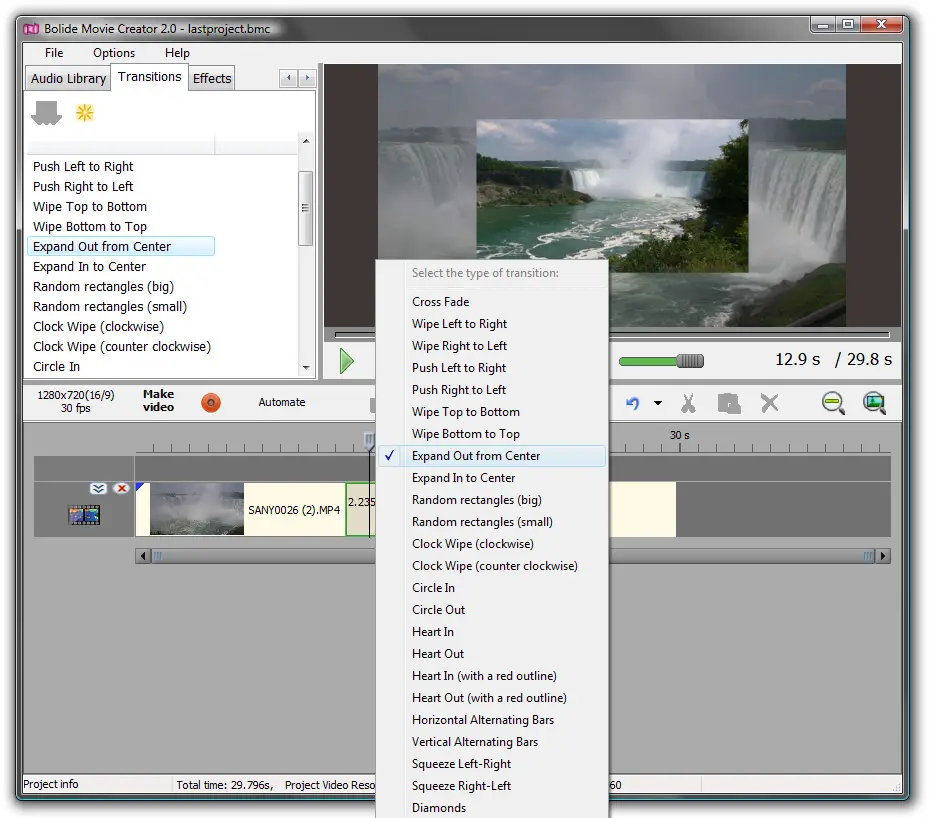
- If you drop a transition onto the beginning or the end of a block that has no neighbor there, the program sets a start or end effect of that type instead (see Fading).
-
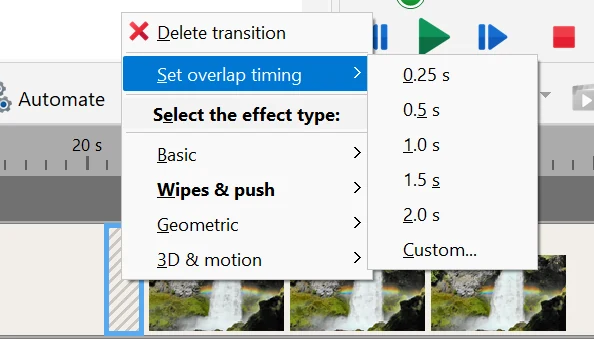
Right-click the hatched transition area to open its menu: Delete transition, Set overlap timing (0.25, 0.5, 1.0, 1.5, 2.0 s or Custom... — this controls the duration and smoothness of the transition) and, under Select the effect type:, the same categories of transitions as on the tab.
- Alternatively, select the intersection of two blocks, choose a transition on the Transitions tab, and click the Set transition button (a single green down arrow) at the top of that tab. The selected transition is applied to the selected intersection.
- Two more buttons on the Transitions tab help with batch work. Set this effect in all the transitions of the track (three green down arrows) replaces the type of all existing transitions with the selected one, and Set random transitions between all clips gives each existing transition a random type. Both buttons work on all tracks of the project, but only where clips already overlap; they do not create new overlaps.
- The Automate button on the timeline toolbar helps create overlaps quickly. Select any block on a track and choose Make Overlap between all movie on with a time from 0.5 to 2.0 seconds: every pair of neighboring clips on the tracks where blocks are selected gets an overlap of that length (the clips move closer together, gaps between them disappear). None removes the overlaps and places the clips end to end. The Make Fading for all the fragments in item of the same menu sets start and end effects, see Fading.
- Start and end effects on blocks (not to be confused with transitions between clips) can be applied to several selected blocks at once via the context menu — see Tips and tricks.
Back to Video Editing Guide.