
Highlight an Area of the Video
The Highlight Area effect darkens the whole picture except one rectangular area, like a spotlight. It is a quick way to show the viewer where to look: a button in a program tutorial, a player on the field, a detail on a product. The picture keeps its size, nothing is zoomed.
Add the effect
- If you want the highlight to last exactly as long as a certain clip, first select this clip on the timeline.
-
Click the Operations on visual blocks button on the timeline toolbar and choose Add Highlight Effect. The command is available when the project has video or photos.
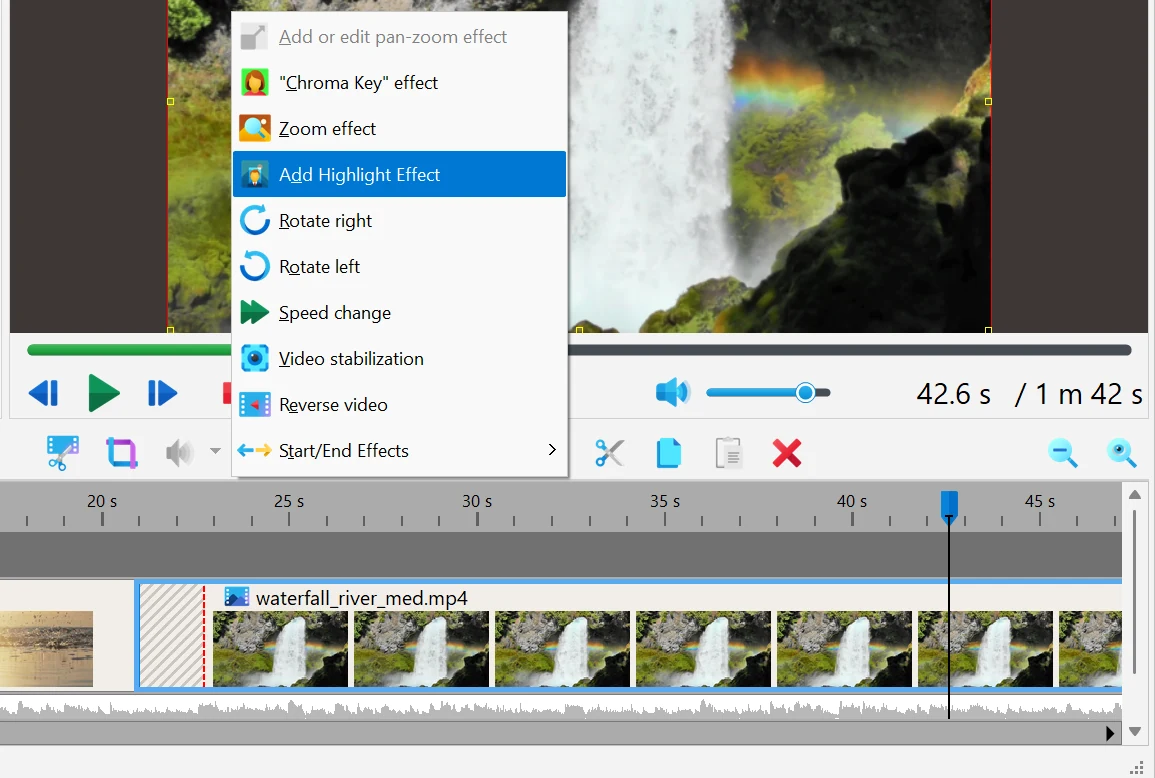
- A "Highlight Area" Effect block appears on the timeline. If a clip was selected, the block is placed on the track right above it (a new track is added if needed), with the same start and length as the clip. If nothing was selected, the block is placed in the middle of the visible part of the timeline, on a track with free space.
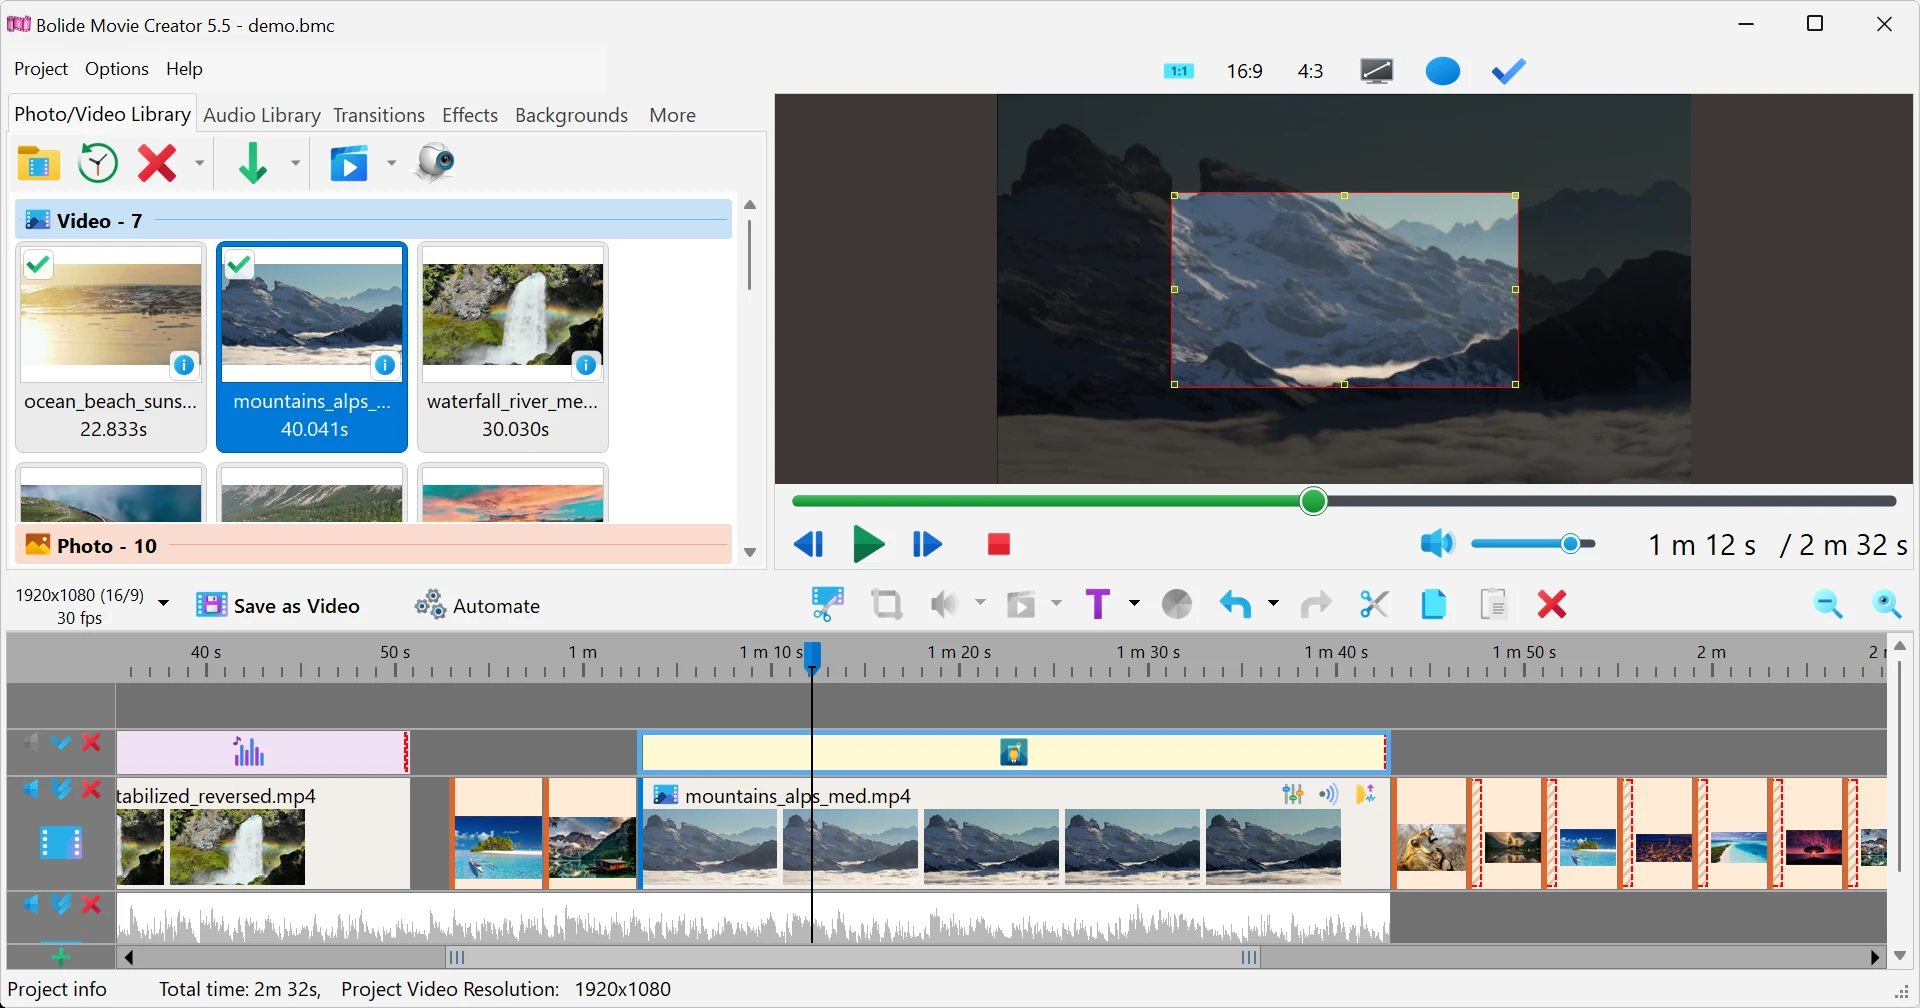
- The preview shows the result at once: the frame is darkened, and a rectangle in the middle, half as wide and half as high as the picture, stays bright.
Set the highlighted area
- Select the highlight block on the timeline. A frame around the bright area appears in the preview window.
-
Drag the frame to move the bright area and drag its corners and sides to resize it. The effect darkens everything that lies on the tracks below it, so it works for any clip under the block.
Timing, darkness and fade
- Move the block along the track to choose when the highlight appears, and drag its ends to make it shorter or longer.
- By default the darkening fades in during the first half second and fades out during the last half second. To change this, drag the inner border of the fade zone at the end of the block, or right-click the block and use Start/End Effects (see Add Fading for Video Clips).
-
Right-click the block and open Transparency to set how dark the area around the highlight is: from 0.1 (barely noticeable) to 0.9, or Full Opaque for solid black. The default is 0.7.
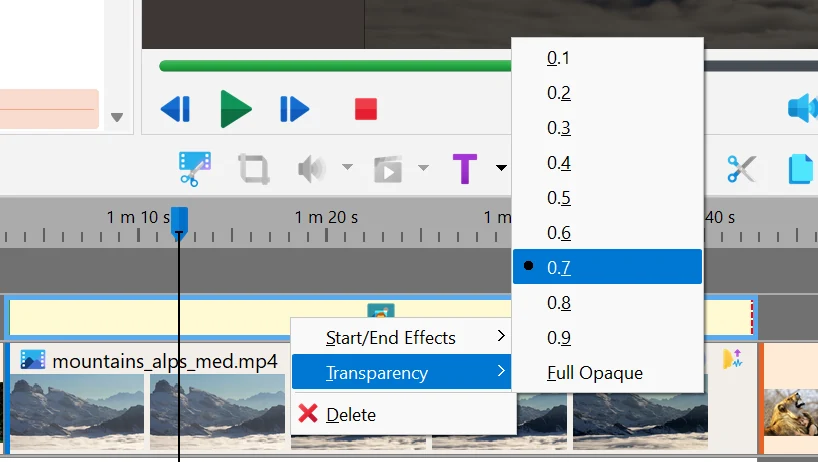
- To remove the effect, select the block and press Del, or right-click it and choose Delete.
Good to know
- To highlight several places one after another, add several highlight blocks, or copy the block and move the copy.
- The Highlight Area effect does not enlarge the picture. If you want the camera to move in to the chosen area, use the Zoom effect from the same Operations on visual blocks menu. You can combine them: first zoom in, then highlight a detail.
- To hide a part of the frame instead of highlighting it, apply the Blur or Mosaic effect to an area of the frame, see Video Effects.
Related topics
- How to Zoom to Selected Area of Video
- Video Effects
- Add Fading for Video Clips
- Add Text Comments to Video
- Working with Tracks and the Timeline
Back to Video Editing Guide.