Working with Tracks and the Timeline
The timeline at the bottom of the window consists of tracks. Each track is a layer, and every clip, photo, text or music file on it is shown as a block. With several tracks you can put a title or a logo over a video, show a picture in a corner of the frame, or play music under the video.
How tracks are layered
- Tracks are layered from the bottom up: the picture on an upper track covers the tracks below it. Put backgrounds on lower tracks and titles, logos and overlays on upper ones. To let the lower picture show through, make the upper block smaller in the preview window or make it transparent.
- The sound of all tracks plays together. Any block can be put on any track: video, photo, text or audio. To move a block to another track, just drag it there.
- There is always one empty track at the top of the timeline. As soon as you put a block on it, a new empty track appears above; extra empty tracks at the top are removed automatically.
Add a track
- To add a layer on top, drag a file from a library or a block onto the empty top track.
- To add a track at the very bottom of the project, click the green plus Add track at the bottom in the bottom-left corner of the timeline (the new track has half height), or drag a block to the empty strip below the lowest track: a new track is created for it.
Track buttons
-
On the left side of every track there are three buttons:
- Turn off the sound of this track - mutes all blocks of the track at once; the picture stays. Click again to turn the sound back on. To mute a single clip, right-click it and choose Turn off sound in this clip (see Adjusting Audio Levels in Your Video).
- Toggle height of the track - switches the track between three heights: full, half and collapsed. Clicks go back and forth: full, half, collapsed, half, full... Lower tracks let more of them fit on the screen.
- Delete track - removes the track. If the track contains blocks, the program warns: This track is not empty, all its contents will also be removed from the project. Click OK to delete or Cancel to keep the track. A deleted track can be restored with Undo (Ctrl+Z).
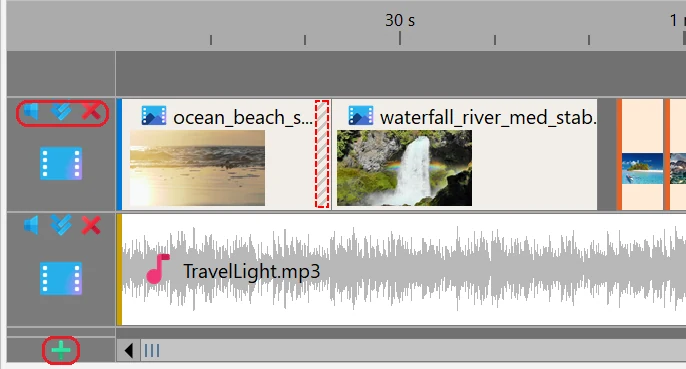
- Double-click the header of a track (its left part with the buttons) to select all blocks of that track; double-click again to deselect them.
Select several blocks
- Hold Ctrl and click blocks one by one to add them to the selection or remove them from it.
-
Or press the left mouse button on an empty place of a track and drag: a blue rectangle appears, and every block it touches is selected (the previous selection is replaced).
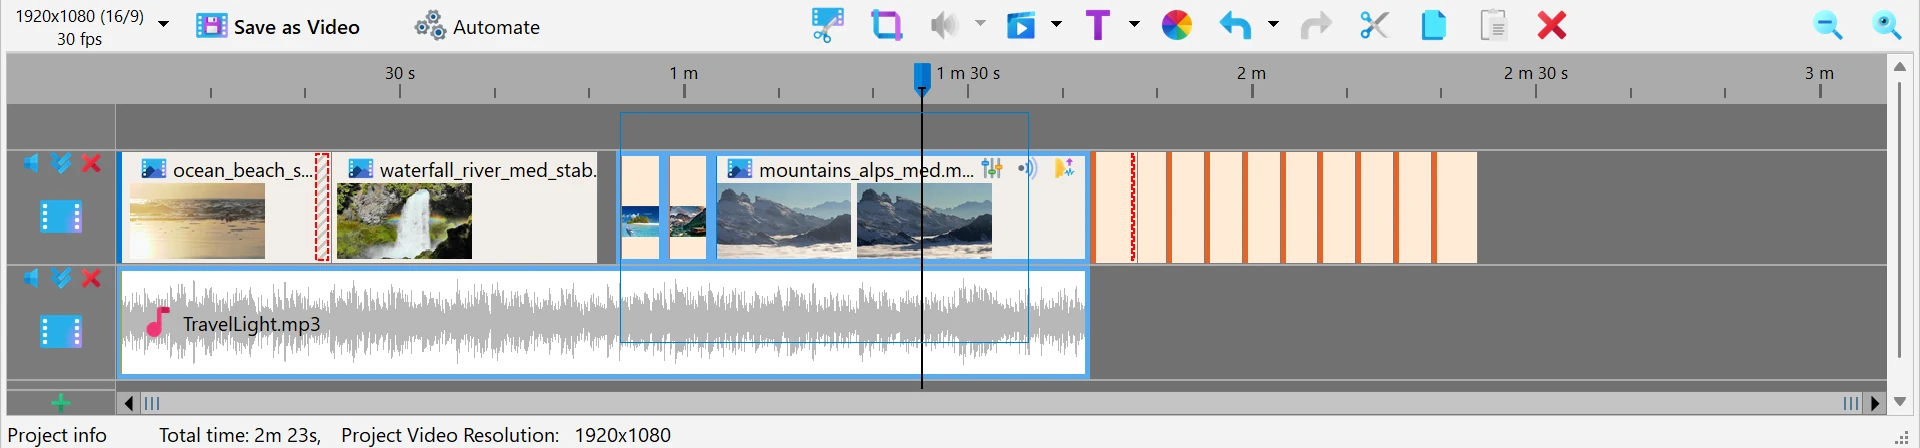
- Selected blocks move together when you drag one of them, and Delete, Cut, Copy and many right-click menu commands work for all of them at once.
- Alt+Left / Alt+Right select the previous or next block on the same track, and Ctrl+Left / Ctrl+Right move the selected blocks by one frame.
Remove empty space or make room
-
Remove a gap. Click an empty space between blocks (or before the first block) on a track: the gap is highlighted. Press Del or click the Delete button on the timeline toolbar. The blocks to the right of the gap move left, but only on this track; other tracks stay as they are.

-
Make room in all tracks. Put the cursor where you need extra space, then drag the cursor (the position slider above the tracks) to the right with the right mouse button. All blocks to the right of the cursor on all tracks move together, so titles and music stay in sync with the video. Drag back to the left to close the space again; the blocks stop when they reach the blocks on their left. Hold Shift while dragging to move only the tracks that contain selected blocks. The operation can be undone with Undo.

- When you drag a block close to another block or to the cursor, it sticks to it. Hold Shift while dragging to place the block freely.
Zoom and scroll the timeline
-
Mouse wheel - scrolls the timeline horizontally along the project.
Shift + mouse wheel - zooms in (wheel up) or out (wheel down) around the mouse pointer.
Ctrl + mouse wheel - scrolls up and down through the tracks when they don't fit on the screen. - From the keyboard: Ctrl+Plus (Ctrl+=) and Ctrl+Minus change the scale by 5%, Ctrl+8 (or Ctrl+* on the numeric keypad) fits the entire project on the screen. You can also drag the edges of the slider under the tracks.
-
Two buttons on the timeline toolbar: Zoom Timeline to see the entire project fits the whole project into the visible area, and Zoom Timeline to see thumbnails zooms in so that even the shortest block is wide enough to show its thumbnail.
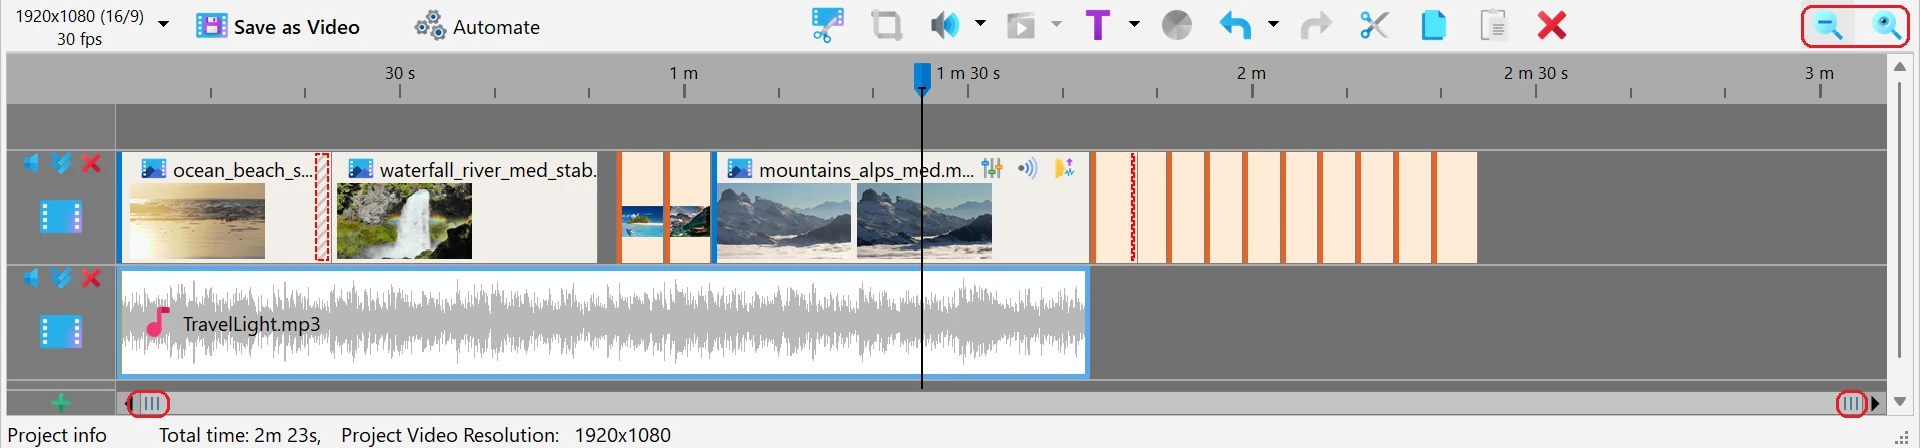
- All of this keeps working while you drag blocks, and the timeline scrolls by itself when you drag a block to its edge. While dragging, Alt + mouse wheel moves the grab point - the place where the mouse holds the dragged blocks. A reminder appears in the status bar: Mouse wheel: scroll | Shift+wheel: zoom | Ctrl+wheel: tracks | Alt+wheel: grab point.
Good to know
- You can use as many tracks as you need.
- While the project is playing, clicks on blocks are ignored so that nothing moves by accident. Pause the preview first (Space).
- Press Esc while dragging a block to cancel the move.
- The shape and size of the frame for all tracks are set by the project resolution, see Project Video Resolution and Frame Rate.
- More tricks for blocks and tracks are collected on the Tips and Tricks page, and all keys are listed in Keyboard shortcuts in Bolide Movie Creator.
Related topics
- Cut and Split Video
- Add Text Comments to Video
- Add Audio to Audio Library
- Adjusting Audio Levels in Your Video
- Change Video Transparency
- Saving and Opening Projects
Back to Video Editing Guide.