Video Effects
Effects change the look of a clip: turn it black and white or give it a film look, blur a face or a license plate, make it look like a cartoon or a sketch, or add falling snow, confetti and glitches. Bolide Movie Creator has 84 video effects on the Effects tab. You can try any of them on a demo picture before using it, apply it to one or several clips at once, and limit it to a part of the frame.
The Effects tab
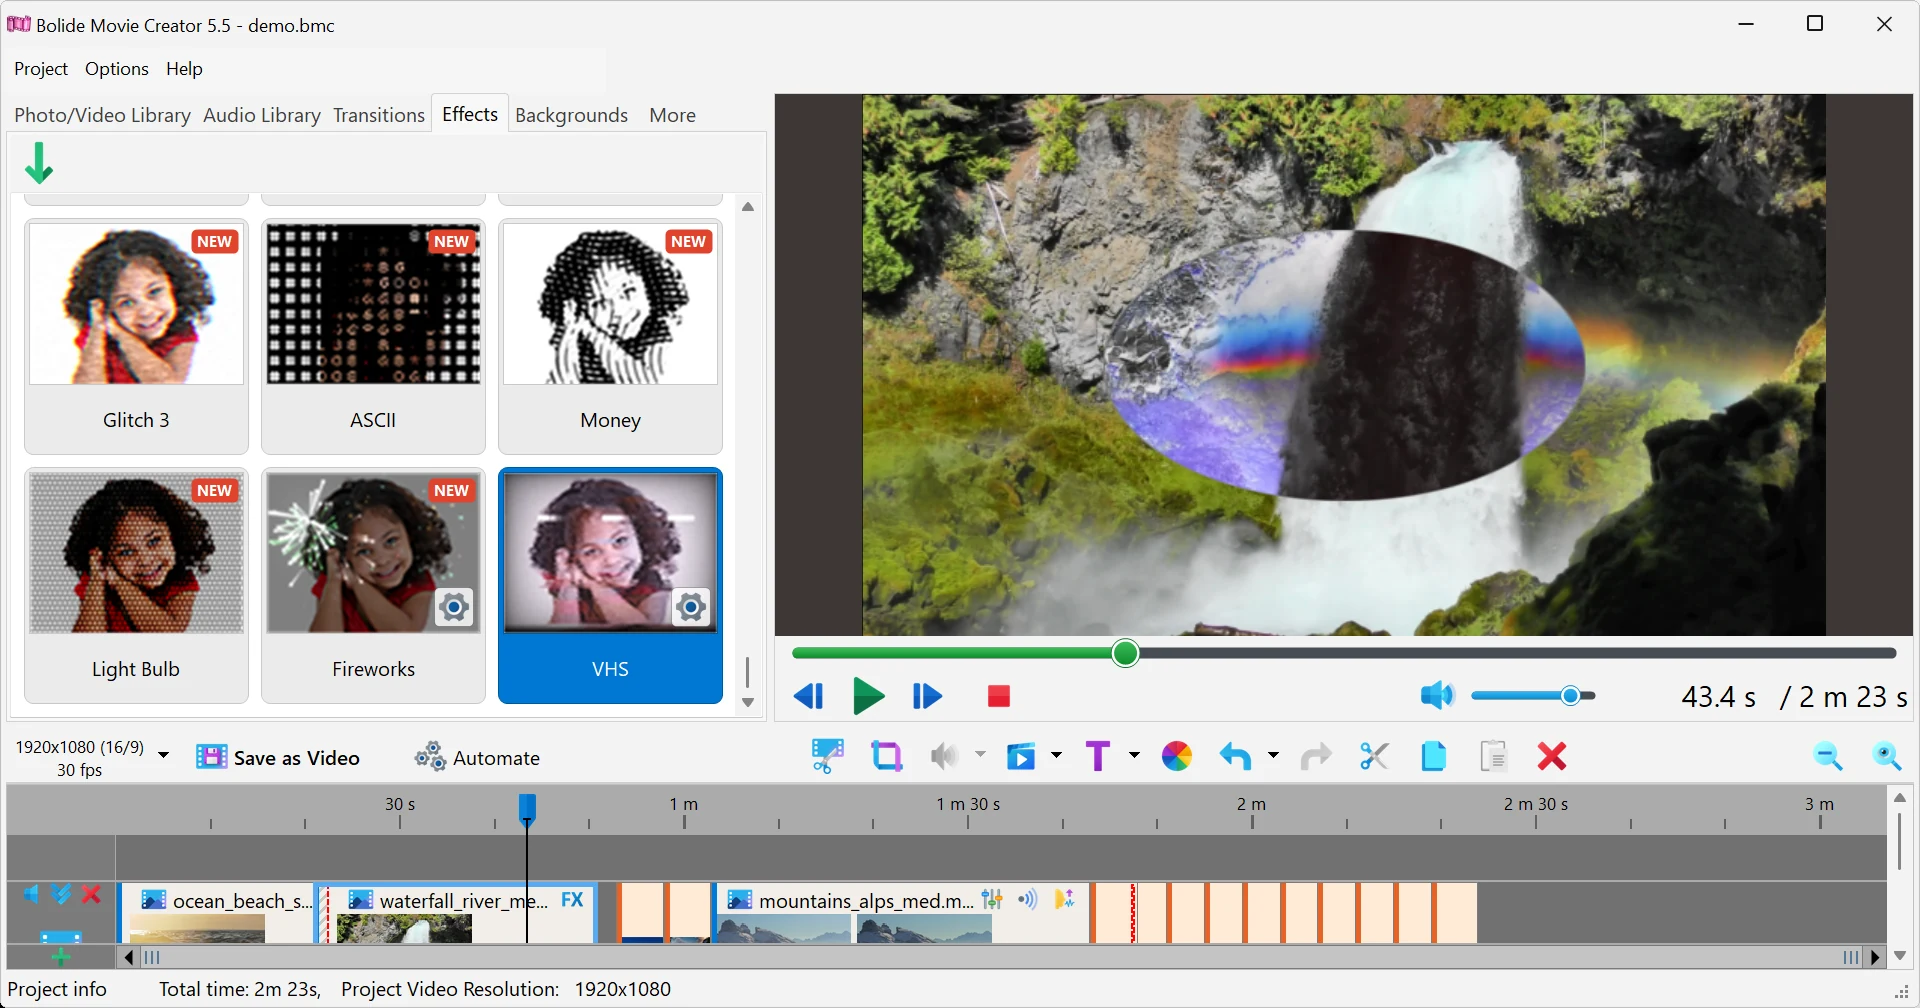
- Open the Effects tab above the library. It shows all effects as cards with a thumbnail and a name. The list is not divided into groups; newly added effects are at the end of the list and are marked with a NEW badge until you click them.
-
Click a card to see the effect in action: the preview window plays a one-minute demo picture with the effect applied. A vertical divider splits the picture: the left part shows the result, the right part shows the original. Drag the divider to compare. You can also move between cards with the arrow keys, the demo follows the selection.
-
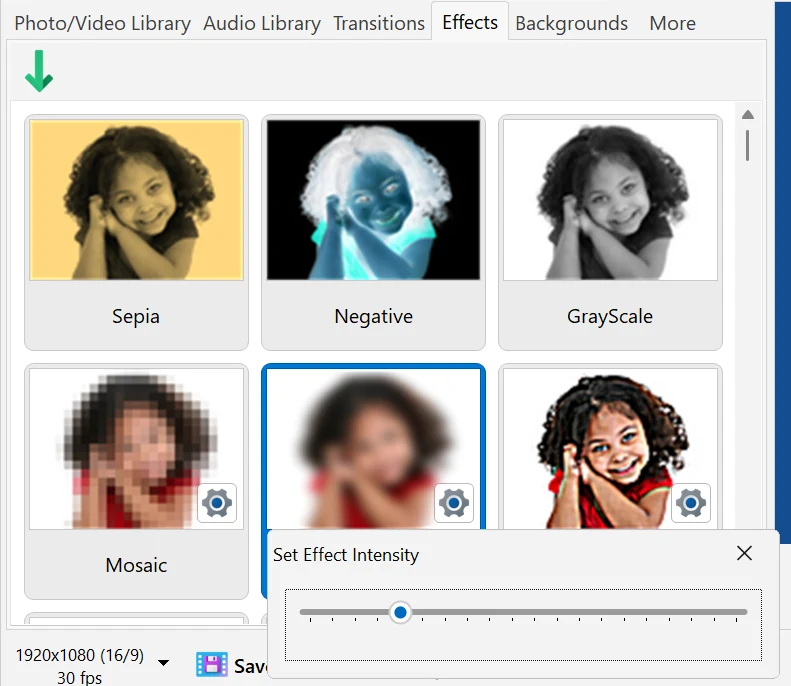
Cards of effects that have a setting show a gear on the thumbnail. Click it to open the Set Effect Intensity window right under the card. It has a single slider; the demo picture changes as you move it. There is no OK button: close the window (or press Esc) when you like the result. The value you choose is used every time you apply this effect to a clip until you close the program.
All effects
- Color and film filters (25): Sepia, Negative, GrayScale, Red World, Green World, Blue World, Night Vision, 1977, Nashville, Hefe, Sutro, X-Pro II, Willow, Brannan, Earlybird, Bleach, Blockbuster, Duo Tone, Tri Tone, Avatar, Night Elf, Shrek, Red Only, Green Only, Blue Only.
- Blur, sharpness and clean-up (9): Blur, Bokeh Blur, Zoom Blur, Tilt Shift, Sharp, Unsharp Mask, Noise Reducer, Dilation, Erosion.
- Artistic and stylized looks (24): Mosaic, Halftone, Bump Mapping, Cartoon, Oil Paint, Sketch, Embroidery, Contour, Color Contour, Edges, Neon Edges, Stained Glass, Frozen Glass, ASCII, Money, Scripture, Grunge 1, Grunge 2, Grunge 3, Dream, Radiance, Light Bulb, TV, Chromatic Aberration.
- Mirrors and distortions (7): Mirror, Quad Mirror, Horizontal Split, Vertical Split, Rotate, Fish Eye, Swirl.
- Animated effects (19): Camera Shake, Twitch, Flicker, Waves, Glitch 1, Glitch 2, Glitch 3, VHS, Bubbles, Hearts, Confetti, Sakura petals, Money rain, Matrix, Smoke, Rain, Snow, Flame, Fireworks.
Effect settings
- 39 effects have a setting (a gear on the card). The slider range and the default value are listed below. For most effects a higher value means a stronger effect; for animated effects with particles it usually means more of them.
- Blur and sharpness: Blur 1–20 (default 5), Bokeh Blur 0–100 (80), Zoom Blur 20–100 (50), Tilt Shift 15–100 (20), Sharp 5–25 (10), Unsharp Mask 0–100 (20), Noise Reducer 1–100 (50), Dilation 1–5 (1), Erosion 1–5 (1).
- Artistic: Mosaic 4–50 (8, the size of the squares), Halftone 3–20 (5), Bump Mapping 20–100 (100), Oil Paint 1–15 (8), Sketch 0–100 (50), Neon Edges 0–100 (30), Stained Glass 0–100 (20), Scripture 0–255 (100), Radiance 0–100 (50), Chromatic Aberration 0–200 (50).
- Mirrors and distortions: Mirror 0–3 (0) — four ways of mirroring the picture (left, right, top or bottom half); Rotate 0–2 (1) — 90°, 180° or 270°; Horizontal Split and Vertical Split 2–10 (2) — the number of copies; Fish Eye 10–100 (60); Swirl −360 to 360 (90) — the twist angle and direction.
- Animated: Camera Shake 1–100 (50), Twitch 1–100 (50), Flicker 1–100 (40), Waves 0–100 (50), VHS 0–100 (50), Bubbles 10–300 (100), Hearts 10–300 (100), Confetti 10–100 (60), Sakura petals 10–100 (50), Money rain 10–100 (50), Matrix 10–100 (50), Smoke 10–100 (50), Rain 0–100 (50), Fireworks 10–100 (60).
- The other 45 effects have no settings.
Apply an effect to a clip
- Effects work on video clips and photos. They cannot be applied to text, backgrounds or audio.
- Drag and drop: drag the effect card from the Effects tab onto a clip on the timeline.
-
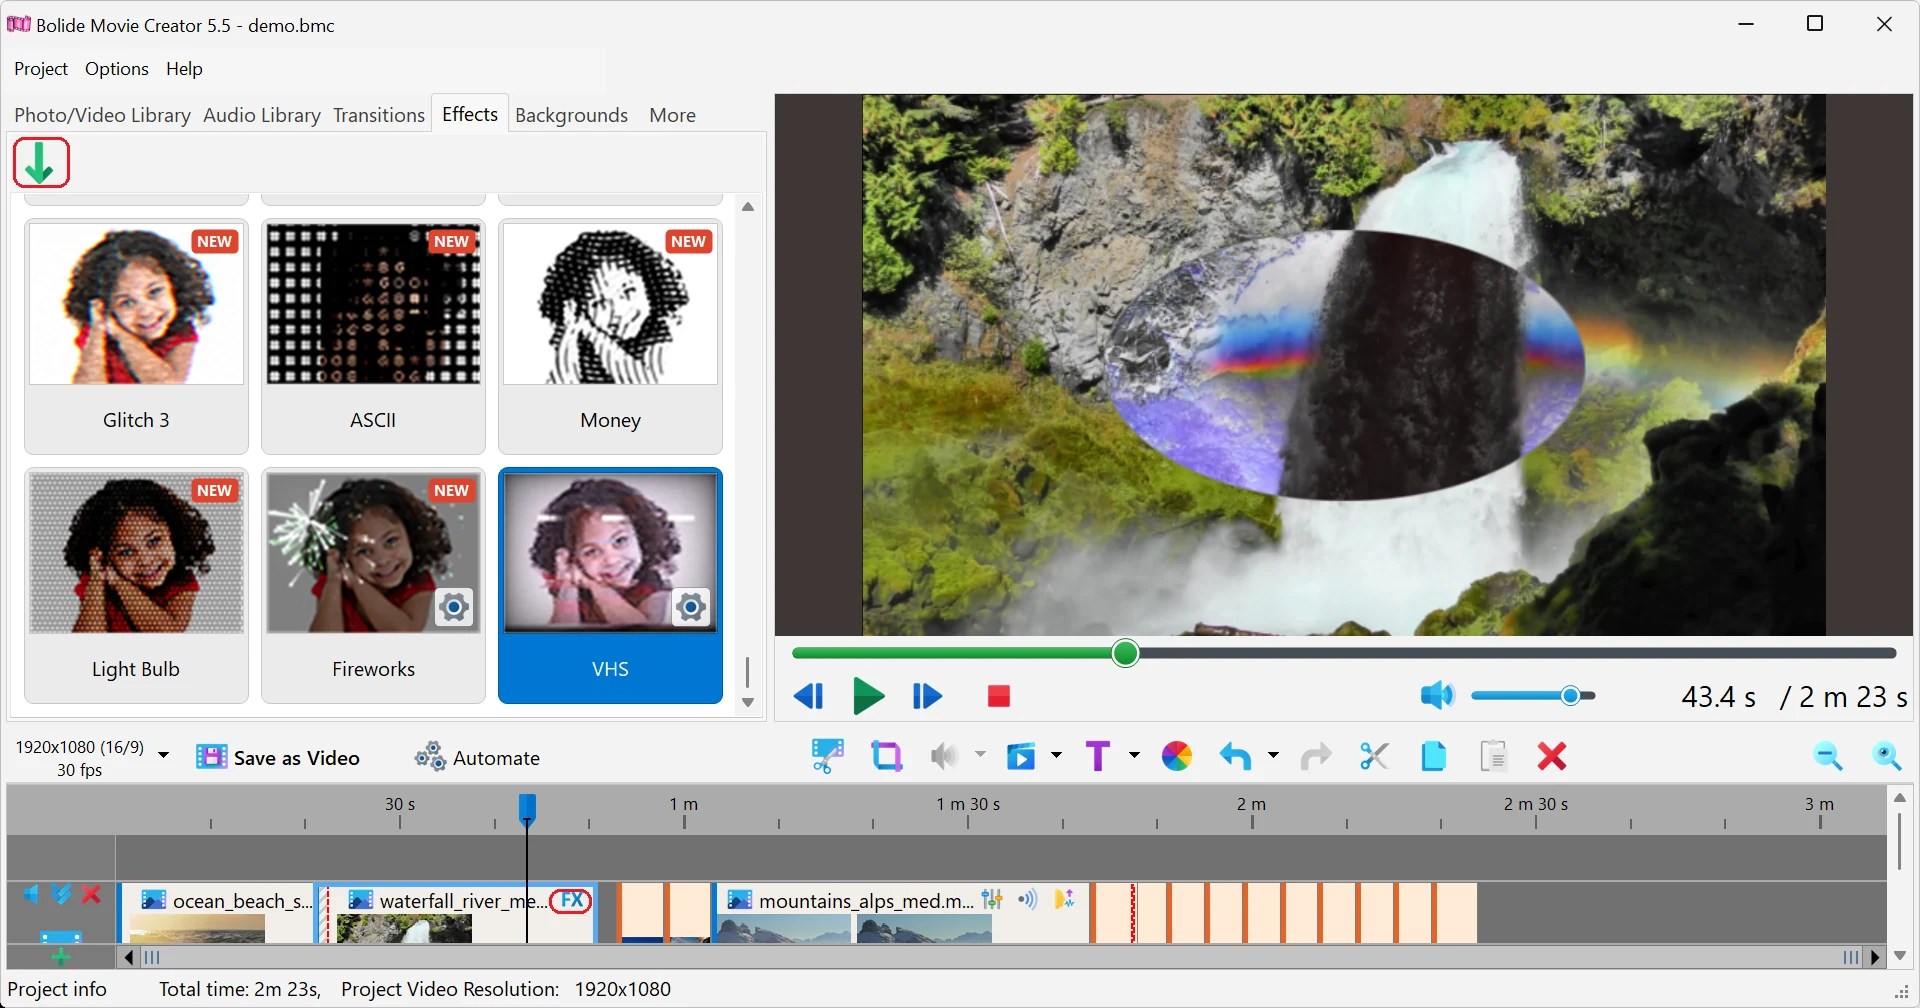
With the button: select the effect card and click Add selected video effect to the clip (the button on the toolbar of the Effects tab). The effect goes to the selected clips; if no clip is selected, to the clip under the timeline cursor. If there are several clips under the cursor on different tracks, the program asks you to select one of them.
- Several clips at once: select the clips (Ctrl+click or drag a selection rectangle on the timeline), then drop the effect onto one of them or click the button. The effect is added to every selected video clip and photo.
- After applying, a small effect icon appears in the top right corner of the clip block (if the block is wide enough and the track is not collapsed). One clip can have several effects; each one gets its own icon, and they are applied together.
- An effect always works for the whole length of the clip. If you need it only on a part of a clip, first split the clip with Split the fragment at the current position (see Cut and Split Video) and apply the effect to one of the pieces.
Choose the area of the frame
- Right after you apply an effect, a frame appears in the preview window: the effect works only inside this frame. A new effect starts with a rectangle in the middle of the frame, half as wide and half as high as the picture. This is how you blur only a face or a license plate.
-
Drag the frame to move it and drag its corners and sides to resize it. While the frame is shown, buttons appear on the panel at the top of the program window: Expand to the whole frame applies the effect to the entire picture, Switch between an ellipse and a rectangular selection area changes the shape of the area, and Done hides the frame.
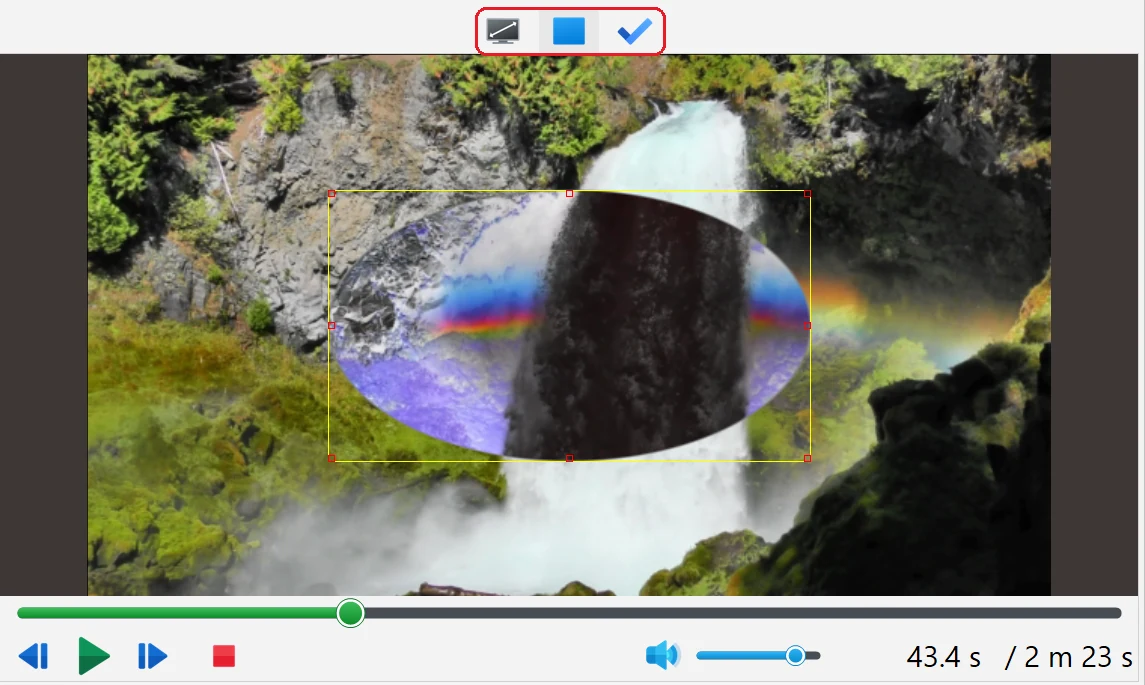
- To change the area later, click the effect icon on the clip and choose Set an area of effect.
Change or delete an effect
-
Click (or right-click) the effect icon on the clip block. The menu shows the effect name at the top and the commands:
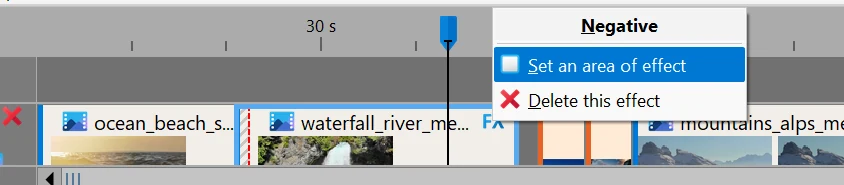
- Set an area of effect — shows the area frame in the preview window (see above).
- Set Effect Intensity... — opens the intensity slider for this clip; the preview shows the change at once. This item is present only for effects that have a setting. Closing the window without changing the value does not count as a change of the project.
- Delete this effect — removes the effect from the clip. If several clips are selected, the same effect is removed from all of them. You can also delete an effect while its area frame is shown in the preview: press Del.
- Adding, changing and deleting effects can be undone with Ctrl+Z.
Good to know
- Effects from the Effects tab can be combined with each other and with other tools: Pan & Zoom, crop, rotation, brightness and color settings. The message Sorry, these effects can not yet be used together with Pan-zoom or Crop appears only when you combine Pan & Zoom, crop, rotation and a Virtual Screen template on the same clip.
- Virtual Screen templates (split screen, picture in a frame) are not on this tab: they are on the More tab, see Create a Virtual Screen Effect Template. Green screen background removal is a separate tool, see How to use Chromakey to replace video background.
- Effects are rendered by the video card. Each effect is extra work for every frame, so many effects on long clips, especially animated ones, can make the preview less smooth and saving the video take longer. The saved video itself is not affected.
- To draw attention to a part of the frame by darkening everything else, see Highlight an Area of the Video; to stop the picture for a few seconds, see Freeze Frame.
Related topics
- Adjusting Visual Levels for Video (brightness, contrast, saturation)
- Add Transitions and Effects
- Create a Virtual Screen Effect Template
- How to use Chromakey to replace video background
- Highlight an Area of the Video
- Freeze Frame
- How to Zoom to Selected Area of Video
Back to Video Editing Guide.