
Reversing a Video
A video played backwards is a simple way to make a funny or magical moment: water flows up, a jumper flies back onto the diving board, a broken cup puts itself together. Bolide Movie Creator creates a new, reversed copy of the video and uses it in your project or adds it to the library. The original file is not changed.
Reverse a whole file from the library
-
Open the Photo/Video Library tab and right-click the video file. Choose Reverse video. The command is not shown for photos.
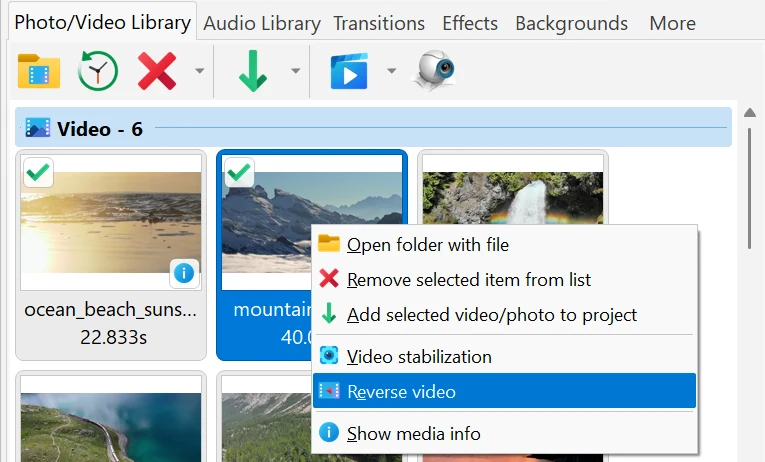
- You can also select the file and click the button with a drop-down arrow on the library toolbar (next to the "add to project" button): its menu contains Video stabilization and Reverse video.
- The whole file is reversed. When the job is done, the new file is added to the Photo/Video Library, and you can drag it to the timeline like any other video.
Reverse a clip on the timeline
-
Select a video clip on the timeline, click the Operations on visual blocks button on the timeline toolbar and choose Reverse video.
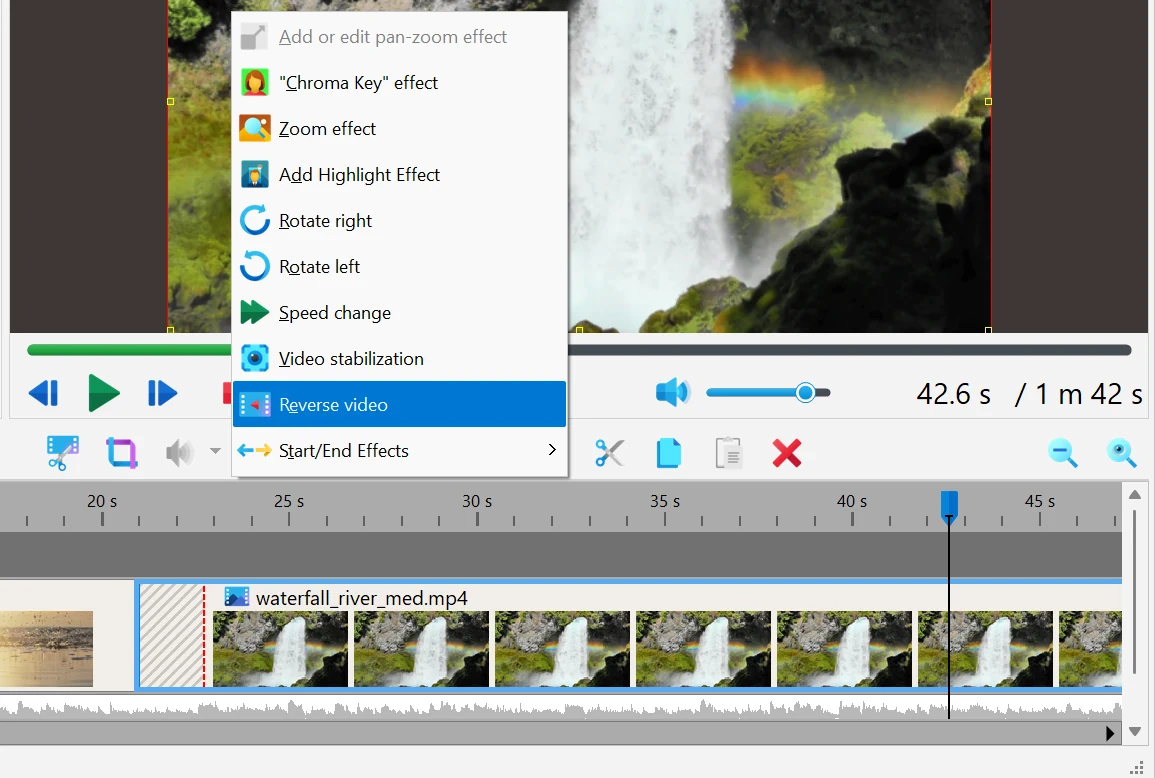
- If the clip is trimmed, only the part used in the project is reversed; if it shows the whole file, the whole file is reversed. So it is faster to cut the clip to the needed fragment first.
- When the job is done, the reversed file replaces the original video in this clip, and the clip on the timeline immediately plays backwards.
The Reverse video window
-
The Reverse video window shows the Source file and the Destination directory where the reversed copy will be saved. The program picks the last folder you used for reversing or stabilization; if there is not enough free space there, it tries your Videos folder, then Documents. The disk must have free space of at least one and a half times the size of the source file.
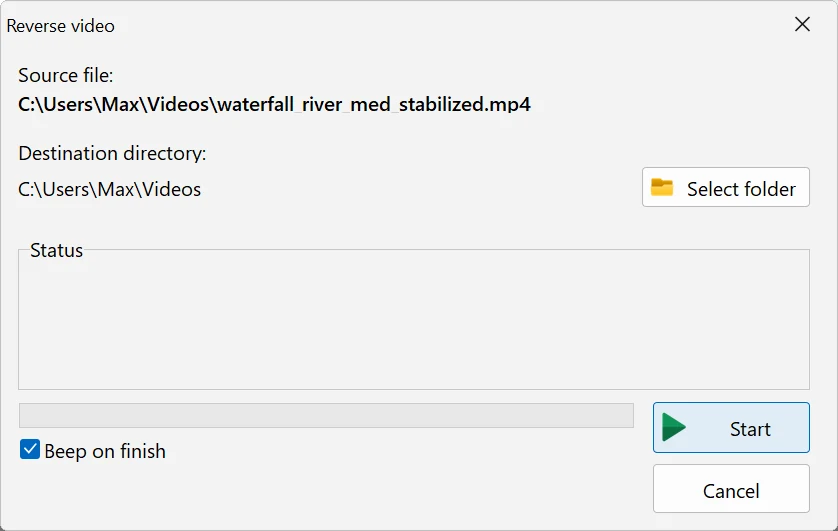
- To save the file somewhere else, click Select folder. If no suitable folder is found, you see Specify a directory where to save the reversed video, and Start stays unavailable until you choose a folder.
- The new file is named after the original with _reversed.mp4 at the end, for example holiday_reversed.mp4. If such a file already exists, a number is added: holiday_reversed(0).mp4, holiday_reversed(1).mp4 and so on.
- Beep on finish is on by default: the program plays a sound when the job is done.
- Click Start. The Status group shows Reversing and saving the video and the approximate Time left, the progress bar fills up. The progress is also shown on the program button in the Windows taskbar, so you can work in other windows while you wait.
- Cancel (or Esc) stops the job and deletes the unfinished file.
-
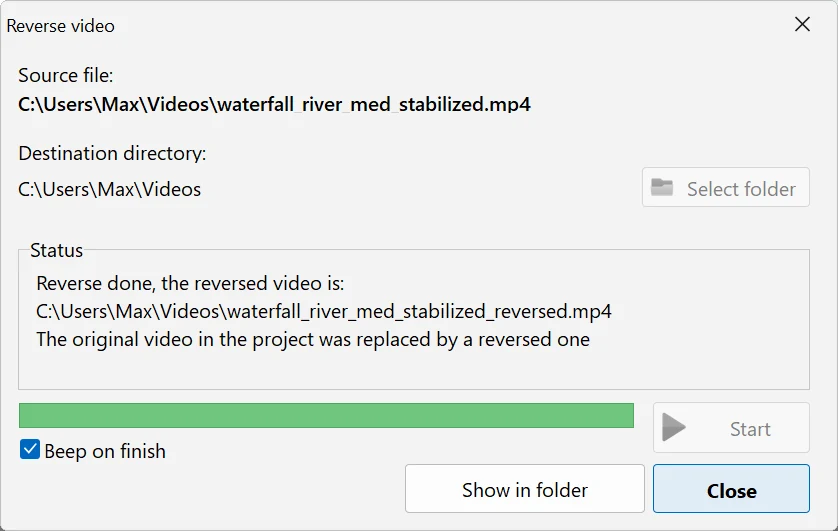
When the job is done, the status shows Reverse done, the reversed video is:, the path of the new file and what happened to it: It was added to the library or The original video in the project was replaced by a reversed one. The Show in folder button appears, and Cancel turns into Close.
Good to know
- The reversed copy is always saved as an MP4 file (H.264 video). The video card is used for encoding when possible. The sound is reversed together with the picture; if you do not need it, turn it off with Audio operations > Turn off sound in this clip.
- Reversing is a separate file operation, not an effect: it cannot be removed with Delete this effect, and it is not an Undo step. To return to the original video, delete the clip and add the original file from the Photo/Video Library again — the original file on disk stays untouched.
- A long video takes a long time to reverse and needs a lot of disk space. Reverse only the fragment you really need.
- The command works only for video. To hold a frame or slow a scene down, see Freeze Frame and Changing Video Speed.
Related topics
- Changing Video Speed
- Freeze Frame
- Video stabilization (deshaking) (uses the same kind of window)
- Cut and Split Video
- Add Photo/Video to Project Library
Back to Video Editing Guide.