Backgrounds: Color, Gradient and SVG Elements
A background is useful behind titles, under a vertical video in a horizontal frame, between chapters or as a simple intro. In Bolide Movie Creator a background is a separate block on the timeline. It consists of a base fill — a solid color or a gradient — and any number of vector (SVG) elements on top: shapes, frames, patterns, icons. Ready backgrounds are kept as presets on the Backgrounds tab.
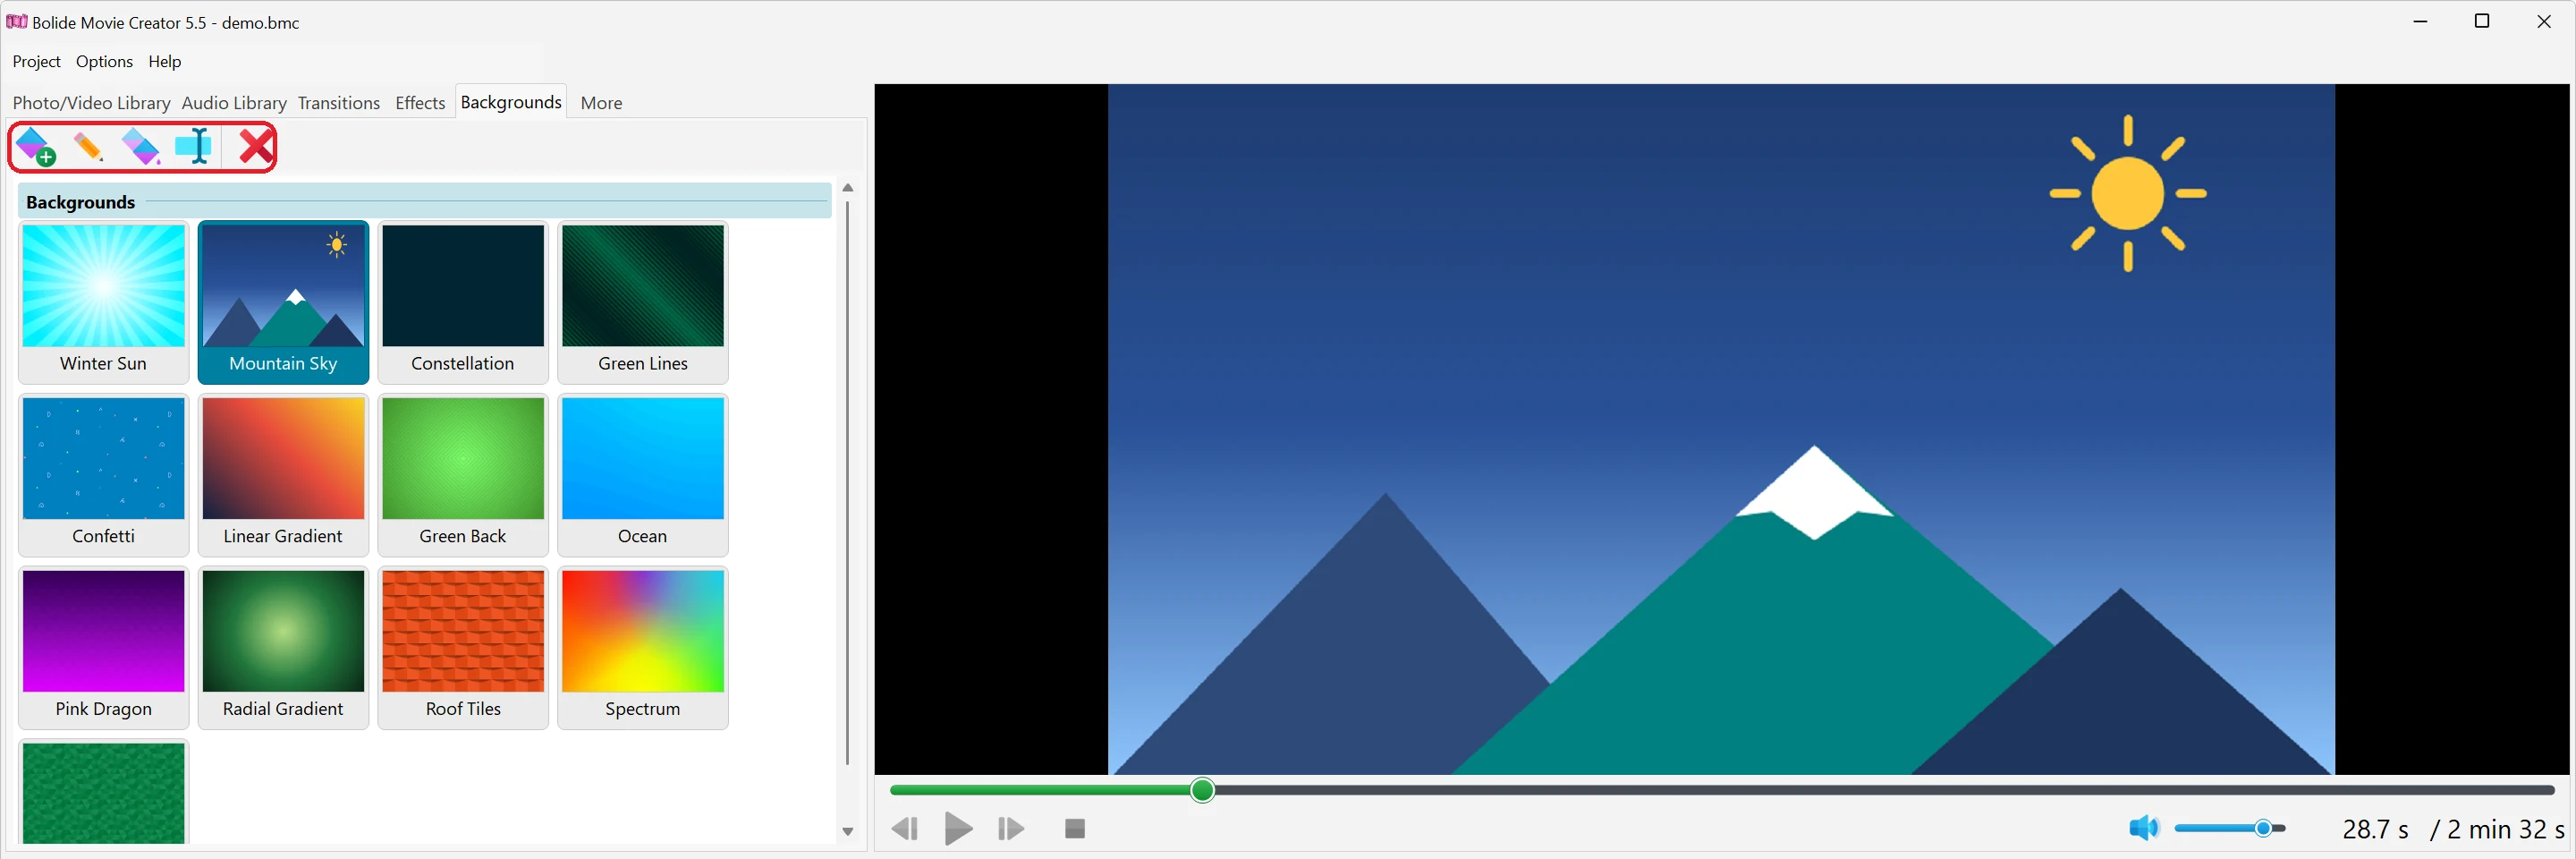
The Backgrounds tab
- Open the Backgrounds tab next to the Audio Library tab. Each tile is a background preset; click a tile to see the background in the preview window.
-
The buttons on the tab toolbar are New preset..., Edit background, Duplicate, Rename and Delete. The same commands are in the right-click menu of a tile.
- New preset... opens the background editor with a new background (a blue radial gradient without elements). When you click OK, the program asks for the preset name.
- Edit background (or double-click the tile, or press Enter) opens the selected preset in the editor; after OK the preset file and its tile are updated.
- Duplicate makes a copy with a free name, for example "Sunset (2)" — handy when you want a variant of an existing background.
- Rename (F2) and Delete (Del; the program asks for confirmation).
-
Tiles can be put in any order by dragging them.
Add a background to the project
- Drag a preset tile onto the timeline. Dropped on an empty place of a track, it creates a 5-second background block; dropped below the lowest track, it creates a new bottom track for it — the usual place for a background, because blocks on higher tracks are shown on top of it. While you drag, the timeline shows where the block will go; a red mark means it can't be dropped there.
- Dropped on an existing background block, the preset completely replaces that block's background.
- A background block can be moved and stretched to any length like a picture. It can also overlap a neighboring block on the same track — the overlap becomes a transition, see Add Transitions and Effects.
The background editor: base fill
-
The Background editor window has the Base fill group at the top, a large canvas with the result in the middle, the SVG elements list on the right and, when an element is selected, the SVG element properties panel on the left.
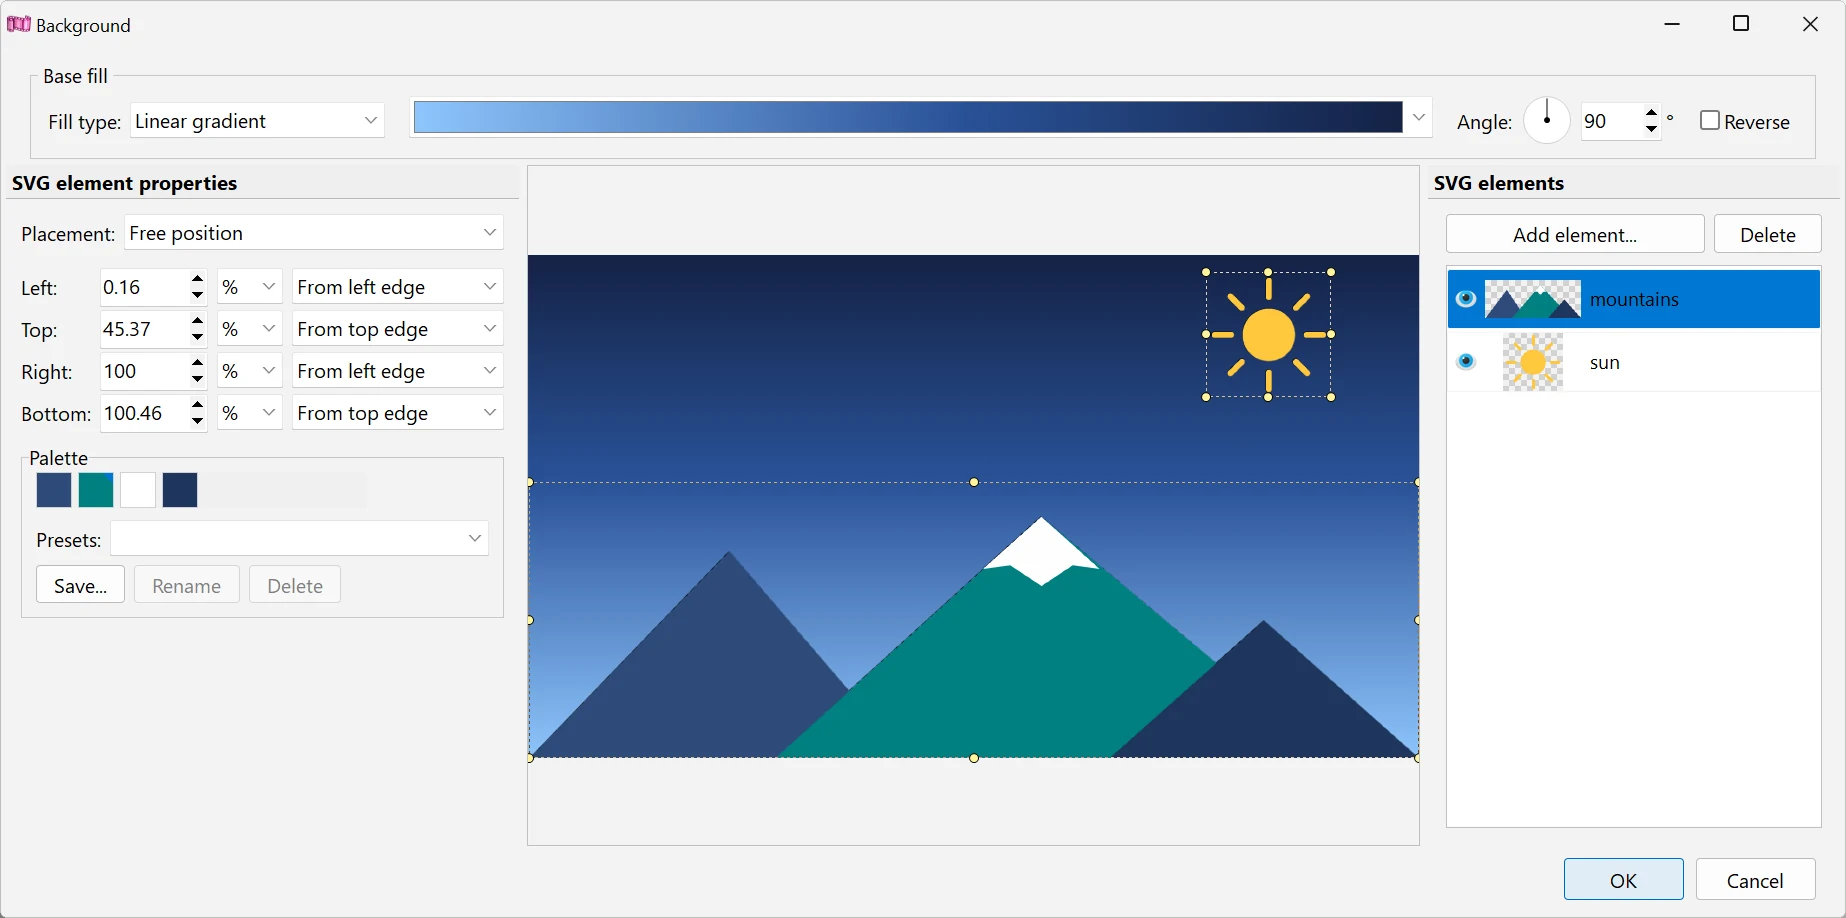
- Fill type: Solid color, Linear gradient, Radial gradient or Reflected gradient (the colors go from the middle line to both edges).
- For Solid color click the Color sample to choose a color, or use the eyedropper button next to it: hold the mouse button on it and point at any place on the screen, the color under the cursor is picked when you release the button.
- For a gradient, the box next to the fill type shows the current gradient. Click the small arrow of the box to choose a gradient from the presets list, or click the box itself to open the Gradient editor (see below).
- Angle — the direction of a linear or reflected gradient, from 0 to 359°: drag the dial or type the value. A radial gradient has no angle, so the field is unavailable. Reverse swaps the order of the gradient colors.
Gradient editor
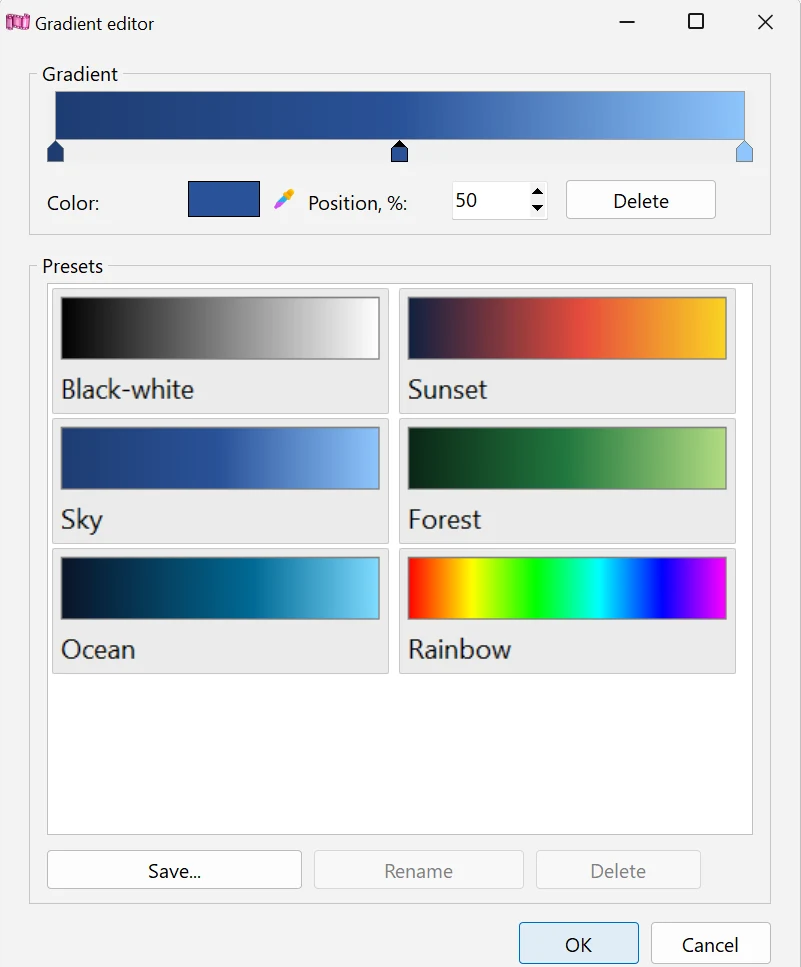
- In the Gradient group there is a color bar with markers (color stops) under it. Click the empty strip under the bar to add a stop — it gets the color the gradient already has at that point. Drag a marker left or right to move it. To remove a stop, drag it far down, select it and press Del, or click Delete; at least two stops always remain.
- For the selected stop you can set the Color (click the sample, double-click the marker, or use the eyedropper button) and the exact Position, % from 0 to 100.
- The Presets group shows ready gradients: click one to load it. Save... adds the current gradient as a new preset under the name you enter; Rename and Delete work with the selected preset. The gradient presets are shared by all backgrounds, and even the ones supplied with the program can be renamed or deleted.
-
All changes are shown on the editor canvas right away. OK keeps the gradient, Cancel returns the one you had before opening the editor.
SVG elements
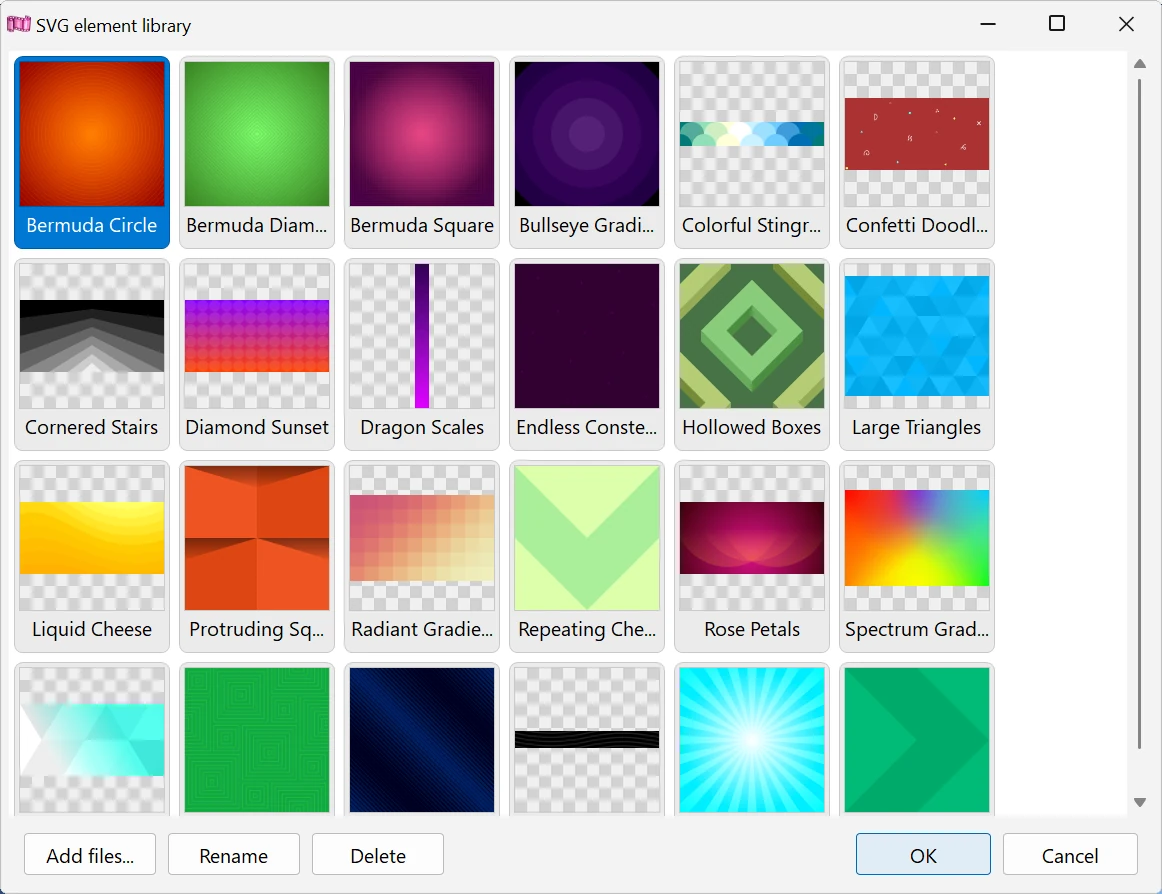
- Click Add element... above the SVG elements list. The SVG element library window opens: select an element and click OK, or just double-click it. The new element is placed in the center of the frame, a quarter of the frame high, on top of the other elements.
-
To use your own SVG files, click Add files... in the library window: the files are copied into the library (if the name is taken, " (2)" is added). Files that are not valid SVG are not added, and the program lists them. Rename and Delete in the library window rename or delete the element file (with confirmation). Library tiles can also be reordered by dragging.
- In the SVG elements list the top row is the front element. Drag rows to change the order. Click the eye icon to hide an element without deleting it. Delete (or the Del key when the canvas or the list is active) removes the selected element. Click an empty place under the list to deselect.
- In Free position mode you can drag an element on the canvas and drag its frame markers to resize it.
SVG element properties
-
Placement:
- Free position — the element's rectangle is set by its four edges (see below);
- Stretch to frame — the element fills the whole frame, its proportions are ignored;
- Stretch keeping aspect ratio — the element covers the whole frame without distortion, the parts that don't fit are cut off;
- Tile — the element is repeated across the frame from the top left corner; Size, % sets the tile height as a percentage of the frame height, from 1 to 400 (25 by default).
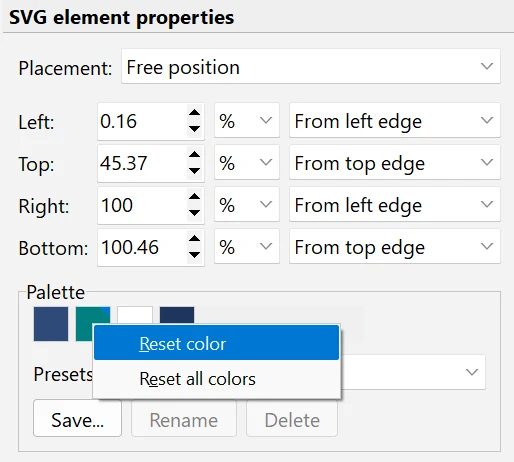
- In Free position mode each edge — Left, Top, Right, Bottom — is an offset from a line of the frame you choose: From left edge, From center or From right edge for the left and right edges, From top edge, From center or From bottom edge for the top and bottom edges. The offset can be shown in pixels (px) or percent (%); positive values go right and down. For example, set the right and bottom edges "from right edge" and "from bottom edge" to keep a logo in the corner at the same distance from the edges in any project resolution.
- Palette shows all colors used in the SVG file. Click a color to replace it. Right-click a color for Reset color (return the original color) or Reset all colors. A changed color is marked with a corner.
-
Color sets can be saved as Presets of this SVG file: Save... asks for a name (entering an existing name overwrites that preset after a question), Rename and Delete work with the selected preset. The first item, Original, is always the file's own colors. Palette presets belong to a particular SVG file, because every file has its own set of colors.
Save and edit a background in the project
- While the editor is open, only its canvas changes; the project preview is updated when you click OK. Cancel (or Esc) discards all changes. If you close the window with the X button after making changes, the program asks Apply the changes to the background?
- To change a background block that is already in the project, double-click it on the timeline or right-click it and choose Edit background. These changes apply only to this block, not to the preset it came from.
- To reuse a background you have adjusted in the project, right-click the block and choose Add to background presets. Enter a name — the new preset appears on the Backgrounds tab, which opens automatically.
- The right-click menu of a background block also has Start/End Effects (see Add Fading for Video Clips) and Delete.
Good to know
- Backgrounds are vector graphics: they are drawn at the resolution of the project, stay sharp at any size and keep their layout if you change the project resolution or aspect ratio (see Project Video Resolution and Frame Rate).
- To show a video or a photo over a background, put the background on a lower track and the clip on a higher one — see Working with Tracks and the Timeline.
- To save the result, click Save as Video.
Related topics
- Working with Tracks and the Timeline
- Add Photo/Video to Project Library
- Add Transitions and Effects
- Scrolling Credits and Ticker
- Music Visualizer
- Project Video Resolution and Frame Rate
Back to Video Editing Guide.