
Saving and Opening Projects
A project is your movie in progress: the clips on the timeline, their order, texts, effects and all other settings. Save the project to a file, and you can close the program and continue editing any time later. A project is not a finished video yet: to get a video file you can watch or upload, save the project as a video (see Convert Video to another Format).
What is stored in a project file
- A project is saved as a file with the .bmc extension. It keeps links to your videos, photos and music and everything you did with them, but not the media files themselves. That's why the file is small, but the program needs the original files: don't move, rename or delete them while you are working on the project. To gather the project and all its files in one place, use Transfer project... (see below).
- The name of the current project is shown in the title bar of the program window. An asterisk (*) after the name means the project has changes that are not saved yet; untitled means the project has never been saved.
Create, open and save a project
-
Project > New Project (Ctrl+N) clears the timeline and the file lists on the Photo/Video and Audio tabs so that you can start from scratch.
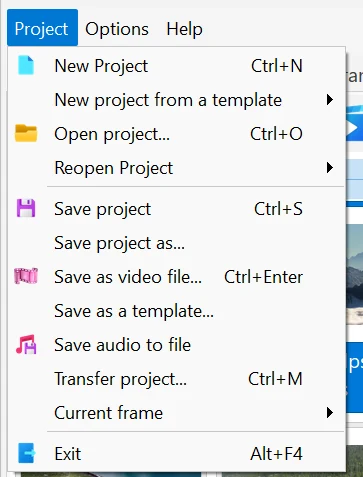
- Project > Open project... (Ctrl+O) opens a saved .bmc file. The dialog starts in the folder of the project you last saved or opened. You can also double-click a .bmc file in Windows Explorer or drag it into the program window.
- Project > Reopen Project lists the last 10 projects you worked with; just pick one. If a project file no longer exists, it quietly disappears from the list.
- Project > Save project (Ctrl+S). The first time the program asks for a folder and a file name (Untitled is suggested); after that Ctrl+S saves the project to the same file without questions.
- Project > Save project as... always asks for a new name and folder. It is handy for keeping a copy of a project before big changes: after saving you continue working with the new file, and the old one stays as it was.
- Important: with autosave turned on (the default), the program does not ask whether to save the current project when you create a new project, open another one or exit: your changes are already saved. But an untitled project is not kept as a separate file: save it under a name first.
Autosave
- The Options > Quick Preferences > Autosave project option is turned on by default (see Program Settings and the Help Menu). The program saves the project right after each change, directly to the project file. There is no separate backup copy, so if you want to keep the original version, make a copy with Save project as... first. The Undo button (Ctrl+Z) works as usual.
- A project that has not been saved under a name yet is autosaved to the service file lastproject.bmc in the program settings folder (%LOCALAPPDATA%\BolideSoftware\MovieCreator\2.7); you will see this name in the title bar. Press Ctrl+S to save the project under your own name. The next new project reuses lastproject.bmc, so the untitled project is overwritten.
- If you turn autosave off, the project is saved only when you press Ctrl+S or choose Save project as.... If there are unsaved changes when you exit, create a new project or open another one, the program asks Save Project?: Yes saves the project (for an untitled project the Save project as window opens), No discards the changes, Cancel returns you to the project. We recommend keeping autosave on.
Recovery after a crash
- If the program was closed unexpectedly last time (an error, a power failure), at the next start it automatically opens the project you were working on, with all the changes up to the last autosave. No extra questions are asked.
- If you don't want that project to open (for example, if something in it causes problems), hold down Shift while starting the program.
- If you start the program by double-clicking a project file, that project is opened instead.
Project templates
- If you often make similar videos (the same intro, logo, titles or music), save such a project as a template and start new videos from it.
- Project > Save as a template... (available when the project is not empty): enter a name (New template is suggested) and click OK. The program copies the project and all the files used on its timeline to its own template folder, so the template keeps working even if you later move the original files. If a template with this name already exists, it is replaced without a question.
-
Project > New project from a template shows the list of your templates. Choose one, and the current project is closed (without a question) and a copy of the template opens as a new untitled project. Save it under your own name with Ctrl+S; the template itself does not change. There are no ready-made templates in the program: the list shows Empty until you save your first one.
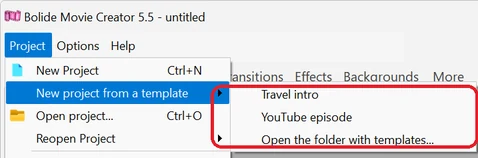
- Open the folder with templates... in the same submenu opens the template folder in Windows Explorer (C:\ProgramData\BolideSoftware\MovieCreator\project_templates). Each template is a subfolder: rename a subfolder to rename the template, delete it to remove the template. The menu is updated when you switch back to the program.
Transfer a project to another computer
- Project > Transfer project... (Ctrl+M) collects the project and all its files in one folder. It is available when the project is not empty. We recommend saving the project under a name first, because the new folder is named after the project file.
- The program saves the project and asks you to choose a folder, for example on a USB drive. There it creates a subfolder with the project name and copies into it the project file and all videos, photos and audio files used on the timeline. Windows shows its usual copying progress, and when copying is finished the folder opens in Explorer.
- All files are put in the same folder next to the project file, and the project refers to them by relative paths, so the folder can be copied anywhere. Different files with the same name are renamed (name_1, name_2...). Files with the same names already in that folder are overwritten without a question.
- Only files placed on the timeline are copied; files that are only in the Photo/Video or Audio lists are not. The program keeps working with the original project; to edit the copy, open the .bmc file from the new folder.
- On the other computer, install Bolide Movie Creator and open the .bmc file from the copied folder.
If some files are missing
-
If some files of the project were moved, renamed, deleted or are on a disconnected drive, the project still opens. Clips from these files stay on the timeline as red blocks with the text File not found and the path of the missing file. They are kept in the project when it is saved, so nothing is lost.
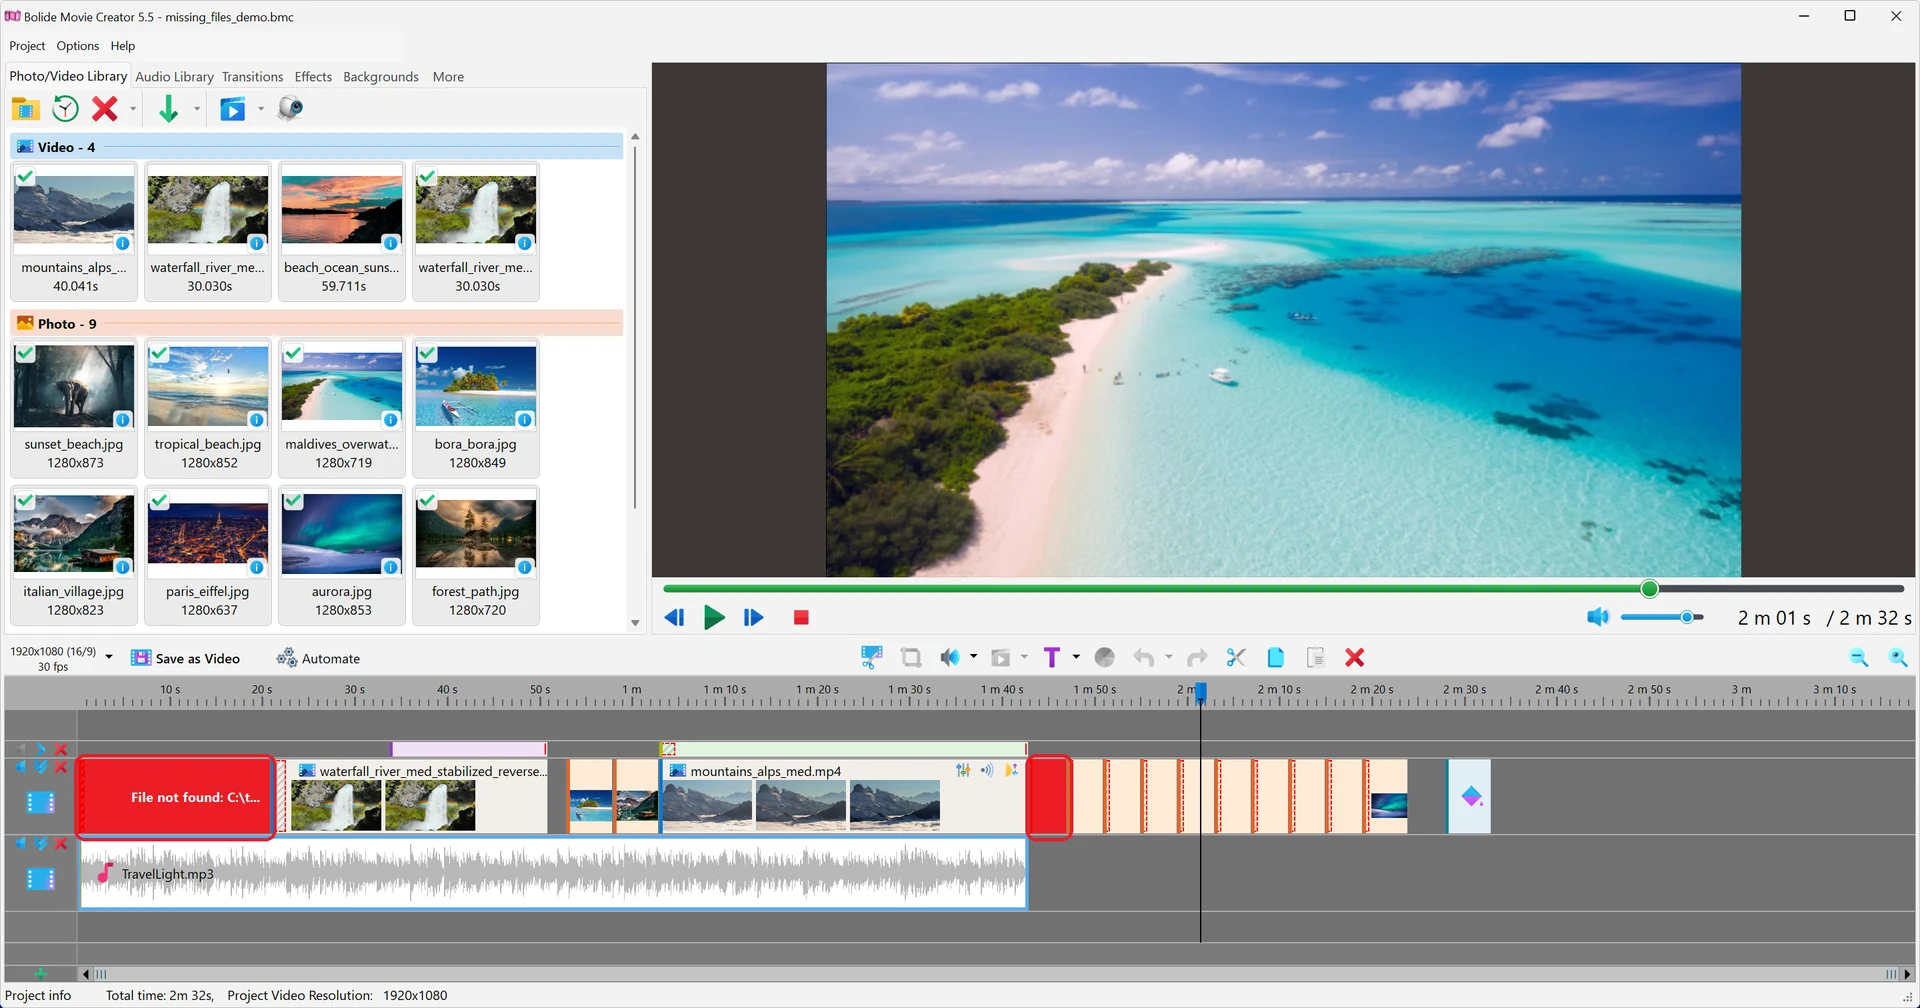
- Return the files to their place (or connect the drive) and open the project again via Project > Reopen Project: the clips are back. If a file is gone for good, click its red block and press Del.
Good to know
- Keyboard shortcuts: Ctrl+N - new project, Ctrl+O - open, Ctrl+S - save, Ctrl+M - transfer project, Ctrl+Enter - save as a video file. See all keyboard shortcuts.
- Only one copy of Bolide Movie Creator runs at a time. If you double-click a project file while the program is already open, the project opens in the same window. If the current project has a name, it is saved first; if it is untitled and not empty, the program asks Save the current project before opening "..."?: Yes lets you save it under a name, No discards it, Cancel keeps it open.
- If a project cannot be saved (for example, the file or folder is write-protected), you will see the message Can not write a file, maybe it is write-protected. Use Save project as... and choose another folder.
- If you add a video that was saved with the trial version of Bolide Movie Creator, a registered program warns you that it has a watermark. The watermark is part of the picture and cannot be removed; it will also be visible in your new video.
- The resolution and frame rate of the video are also stored in the project, see Project Video Resolution and Frame Rate.
Related topics
- Add Photo/Video to Project Library
- Convert Video to another Format (saving the finished video)
- Project Video Resolution and Frame Rate
- Working with Tracks and the Timeline
- Editing a video in Bolide Movie Creator. Tips and tricks
Back to Video Editing Guide.